If you have been shopping for a gaming PC lately, you have probably felt the pressure of choice. Do you spend hours researching parts, watching build guides, and wrestling with cable management? Or do you simply pull out your wallet, order a pre-built system, and be gaming by the weekend?
The debate between building your own PC and buying a pre-built one has been going on for decades, but in 2026, the landscape has shifted enough that the old answers do not always apply. Let us break it all down honestly.
The Old Argument: Why Building Always Won
For most of the 2010s, the answer was almost universally the same: build it yourself and save money. The logic was simple. Retailers and manufacturers who sold pre-built systems charged a significant premium for the convenience factor. You could often get noticeably better hardware for the same price by sourcing your own components.
Beyond the cost savings, builders also had full control over every part in their system. You could choose a quieter cooler, a better power supply, or a faster SSD without being forced into whatever a manufacturer decided to bundle together. Pre-built systems were also notorious for cutting corners in areas that were easy to overlook, such as stuffing a powerful GPU into a case with a cheap 450-watt power supply or pairing a high-end processor with slow, low-capacity RAM.
The DIY crowd also pointed to repairability and upgradability. When something breaks in a self-built system, you know exactly what to replace. Pre-built warranties sometimes required you to send the entire machine in for service, leaving you without a computer for weeks.
These arguments were largely valid, and for a long time, building your own PC was the smarter move for almost everyone who was willing to put in the time.
How 2026 Changed the Equation
The gaming PC market in 2026 looks meaningfully different from what it did five years ago. Several converging forces have tightened the gap between pre-built and DIY systems.
First, component pricing has become far more competitive and consistent. The GPU shortage era, which caused graphics card prices to balloon to absurd levels, has largely resolved. Manufacturers have adjusted supply chains, and competition in the GPU space has brought prices closer to MSRP in most cases. This matters because it removes one of the biggest cost advantages that DIY builders used to enjoy.
Second, large system integrators have become significantly more sophisticated. Companies like CyberPowerPC, iBUYPOWER, and even major brands like HP’s OMEN and Dell’s Alienware line have responded to consumer criticism by offering more transparent build configurations. Many pre-built systems in 2026 now come with better-balanced components than they did a few years ago, and the days of a 750-watt PSU being a hidden cost-cut are slightly less common, though not entirely gone.
Third, the time cost of building has become a more honest part of the conversation. Between researching compatibility, waiting on multiple shipments, troubleshooting driver issues, and managing the learning curve, a first-time builder can easily invest 10 to 20 hours before the machine ever boots successfully. For a student, a working professional, or a casual gamer who just wants to play, that time has real value.
Is It Cheaper to Build or Buy a Gaming PC in 2026?
This is the question most people are actually asking, and the honest answer is: it depends, but less dramatically than it used to. For a mid-range gaming PC in the $800 to $1,200 range, building your own system can still save you somewhere between $100 and $200 compared to an equivalent pre-built. That savings is real, but it is not the enormous gap it once was.
At the high end, above $1,500, the DIY advantage tends to grow a little larger. Enthusiast-grade builds allow you to allocate your budget more precisely, spending more on the GPU and CPU while choosing modest but reliable storage and cooling options. Pre-built systems at this price tier often include premium branding and aesthetics as part of the cost, which may or may not matter to you.
At the budget end, below $700, pre-built systems can sometimes actually be more cost-effective because manufacturers buy components at bulk wholesale prices that individual consumers cannot access. A $599 pre-built might use OEM parts you cannot buy retail at those same prices, making it genuinely hard to beat on pure component cost alone.
The keyword question of whether it is cheaper to build or buy a gaming PC in 2026 does not have a universal answer. It depends heavily on your target price range, your patience for deal-hunting, and whether you are counting your own time as a cost.
Is Building a Gaming PC Still Worth It for Casual Gamers?
This is where the conversation gets more nuanced. If you are a hardcore enthusiast who loves the process of building, wants to overclock, plans to upgrade frequently, and enjoys having deep knowledge of your system, then building your own PC is absolutely still worth it. The satisfaction alone has real value for that kind of person.
But for casual gamers, the calculus looks different. If you play a handful of popular titles, want stable performance, and do not plan to tinker under the hood, a well-chosen pre-built system in 2026 can be a perfectly reasonable purchase. The key is knowing what to look for and what to avoid.
When evaluating a pre-built, always check the PSU wattage and brand, since this is still one of the most commonly skimped components. Verify the RAM speed and whether it is running in dual-channel configuration. Look at the storage situation, specifically whether the system uses an NVMe SSD or an older SATA drive. And pay close attention to the cooling solution, because many budget pre-builts still use minimal airflow cases with inadequate fans.
If a pre-built passes those basic checks and the price is competitive, there is no shame in buying it. The stigma around pre-builts has faded for a reason. The quality floor has risen.
For casual gamers specifically, the reduced complexity is a legitimate feature. You do not need to watch hours of tutorials. You do not need to worry about whether your RAM is on the motherboard’s QVL list. You plug it in, install your games, and play. That experience has genuine value that the build-it-yourself crowd sometimes dismisses too quickly.
Conclusion
The built vs. bought debate in 2026 is less of a landslide than it used to be. Building your own gaming PC still offers meaningful benefits, including customization, upgradability, and modest cost savings in most price ranges. But pre-built systems have matured considerably, and for casual gamers or anyone who values their time over marginal savings, they represent a legitimate and increasingly competitive option.
The smartest approach is to price out both options before deciding. Use a parts picker tool to spec out your ideal build, then compare it honestly against pre-built systems in the same range. You might be surprised how close the numbers are. Whatever you choose, the best gaming PC is ultimately the one that gets you playing the games you love without unnecessary frustration.
Need Computer Services Near You?
Here at B & L Custom Computers, we specialize in creating custom-built computers to meet the unique needs of our customers. With 18+ years of experience, we also offer high-quality newly built & refurbished computers that look and perform like new. Our services extend beyond sales to include computer repairs, upgrades, data migration, and recovery. Whether you need a new computer, a repair, or help with virus removal or spamware, our experienced team is here to provide expert assistance. Contact us today to learn more about what we can do for you!
The world of PC building is constantly evolving. With every generation of hardware, enthusiasts are offered exciting new features, improved performance, and opportunities to stretch their creative muscles. But it’s not all good news. Alongside these innovations, there are industry missteps and trends that complicate the building process or push costs higher for little benefit. In this blog, we’ll explore both sides of the coin, celebrating the wins and spotlighting the fails that are shaping today’s PC landscape.
The Best Trends in PC Building
One of the most exciting parts of being a PC enthusiast in 2025 is watching how certain trends are making the experience better than ever. From performance breakthroughs to cost-effective options for budget gamers, here are the highlights.
AMD Ryzen 7 9800X3D: A Gaming Powerhouse
The release of the AMD Ryzen 7 9800X3D has redefined what builders expect from a gaming CPU. Previously, gamers often had to choose between high-performance cores for gaming and productivity or settle for one at the expense of the other. That compromise is gone. This chip delivers exceptional performance gains without the limitations of earlier 3D V-Cache models, making it the gold standard for modern gaming rigs. The thermal efficiency has also improved, allowing gamers to maintain top-tier frame rates while keeping temperatures under control. For those looking to build a system that prioritizes gaming above all else, the Ryzen 7 9800X3D represents a smart and forward-thinking choice.
Budget GPU Renaissance: Great Gaming Without Breaking the Bank
Just a few years ago, building a capable 1440p gaming PC for under $1,000 seemed nearly impossible. Prices were inflated, inventory was scarce, and affordable cards couldn’t keep up with the demands of modern games. Enter the Intel Arc B580 and its budget-friendly competitors. The Budget GPU Renaissance has opened the door for new builders to get into the hobby without financial strain. These high-value cards not only offer smooth 1440p performance but also support modern features like ray tracing and upscaling technologies. Now, entry-level gamers no longer have to compromise on resolution or frame rates.
DDR5 Maturity: Fast, Affordable, and Finally Worth It
When DDR5 first hit the market, early adopters were met with sky-high prices and modest performance gains. Today, that story has changed entirely. DDR5 has matured into the clear choice for new builds. High-speed kits are not only more widely available, but their prices have also dropped significantly. Builders can now find DDR5 memory with excellent timings and bandwidth at a cost that makes sense, effectively replacing DDR4 as the default standard. The performance benefits in gaming, productivity, and multitasking are real, and the market has reached a point where skipping DDR5 is no longer a sensible option.
PCIe 5.0 SSDs: Instant Access, No Waiting
PCIe 5.0 SSDs are the silent revolution in PC performance. While GPUs and CPUs often steal the spotlight, these next-gen drives are transforming the user experience in subtle but meaningful ways. Open-world games that once took minutes to load now launch in seconds. File transfers are blisteringly fast, and content creators benefit from seamless workflow acceleration. PCIe 5.0 has pushed storage speeds into territory that makes loading screens feel like a relic of the past. Although they still carry a premium, the performance gap between these drives and older models is significant enough to justify the investment for many users.
Undervolting: Smart Efficiency Over Raw Power
Overclocking used to be the crown jewel of enthusiast PC culture, but a new strategy has quietly taken its place. Undervolting is the modern builder’s weapon of choice, delivering impressive results without the risks associated with pushing components past their limits. By fine-tuning voltage levels, users can reduce heat output and power consumption while maintaining, or even improving, performance. This approach not only extends the lifespan of hardware but also enables quieter systems and lower energy bills. It’s a smarter, more sustainable way to optimize a build, and it’s quickly becoming the go-to method for performance tuning.
The Worst Trends in PC Building
While innovation continues to drive the industry forward, not all changes are welcome. Some trends add unnecessary complexity, inflate costs, or alienate new builders. These missteps are worth paying attention to, especially if you’re planning your next build.
“Paper” Launches: Hype Without Hardware
Few things are more frustrating to PC builders than “paper” launches. These are product releases in name only, where stock is announced but never actually reaches shelves in meaningful quantities. Bots often scoop up inventory within seconds, only for the hardware to appear on resale sites at double the MSRP. Enthusiasts are left refreshing pages, joining lotteries, or resigning themselves to overpriced second-hand options. This trend undermines the excitement of new hardware releases and sours the experience for loyal customers. It’s a problem that manufacturers and retailers have yet to adequately solve.
AI-Driven Price Hikes: Gaming Hardware Takes the Hit
The rapid growth of AI has sparked incredible technological advancements, but it’s also caused serious disruptions in the consumer market. The biggest casualty? RAM and VRAM prices. With data centers scooping up vast quantities of high-capacity memory for AI workloads, supply has become strained. As a result, everyday gamers and creators face inflated prices on GPUs, memory kits, and even SSDs. What used to be mid-tier components now carry high-end price tags, forcing budget-conscious builders to make sacrifices. The AI boom has shifted priorities, and consumers are bearing the cost.
Overbuilt Motherboards: Features Nobody Asked For
Motherboards used to be a practical component, selected for compatibility and basic features. Today, it’s not uncommon to see boards costing upwards of $500, packed with features that 95% of users will never touch. AI-powered fan controls, built-in LED diagnostics, and excessive power stages may sound appealing on a spec sheet, but they often offer minimal real-world benefit. These overbuilt motherboards divert funds from more impactful components like GPUs or SSDs. Unless you’re a hardcore overclocker or niche enthusiast, the average user would be better served by a mid-range board that covers the essentials without the fluff.
Custom Loop Maintenance: Beautiful But Burdensome
There’s no denying the visual appeal of a well-executed custom water-cooling loop. These builds look stunning and often become centerpieces in gaming rooms or studios. However, the reality of maintaining these systems has become a growing concern. Frequent cleaning, leak testing, and coolant replacement turn what should be a fun hobby into a part-time job. The maintenance burden is especially heavy for users who just want reliable performance without the hassle. As all-in-one liquid coolers continue to improve, the appeal of complex custom loops is starting to fade outside of showcase builds.
Confusing Naming Schemes: Deciphering the Alphabet Soup
One of the most baffling trends in modern hardware is the increasingly convoluted naming schemes from major manufacturers. Whether it’s GPUs labeled “Super,” “Ti,” “XT,” or CPUs that barely differ in performance but have wildly different names, casual builders are often left scratching their heads. This confusion makes it difficult to compare components or understand value, especially for newcomers to the hobby. Instead of clarity, marketing-driven names create uncertainty, leading to buying mistakes or decision paralysis. Clear and consistent naming would go a long way in helping builders make informed choices.
Conclusion
PC building in 2025 is a landscape of contrast. On one side, we have genuine breakthroughs that have made gaming more accessible, performance more efficient, and the overall experience more rewarding. The rise of the AMD Ryzen 7 9800X3D, the return of affordable GPUs, and the maturation of DDR5 and PCIe 5.0 storage have pushed the industry forward in meaningful ways. On the other side, issues like supply chain manipulation, AI-fueled price hikes, and overbuilt hardware threaten to dilute that progress.
For enthusiasts and newcomers alike, staying informed is essential. The best trends can help you build smarter, faster, and cheaper systems, while recognizing the worst can save you money, time, and frustration. The future of PC building is bright, but only if we continue to demand transparency, value, and innovation where it matters most.
Need Computer Services Near You?
Here at B & L Custom Computers, we specialize in creating custom-built computers to meet the unique needs of our customers. With 18+ years of experience, we also offer high-quality newly built & refurbished computers that look and perform like new. Our services extend beyond sales to include computer repairs, upgrades, data migration, and recovery. Whether you need a new computer, a repair, or help with virus removal or spamware, our experienced team is here to provide expert assistance. Contact us today to learn more about what we can do for you!
Christmas is just around the corner, and for gamers and tech enthusiasts, there’s no better time to unwrap the joy of a new custom-built PC. Whether you’re shopping for yourself or searching for the perfect gift, building a tailored machine brings together performance, personalization, and the excitement of high-end tech. As holiday sales heat up and deadlines approach, now is the time to explore the best custom PC builds for Christmas. From elite gaming rigs to budget-friendly setups, this season offers options for every level of need and experience. In this guide, we’ll cover everything from holiday gaming PC build recommendations to essential component selection, ensuring your Christmas is packed with power and precision.
Why Custom PC Builds Make the Ultimate Holiday Gift
Gifting a custom PC goes far beyond handing over a wrapped box. It’s a highly personal experience that reflects a deep understanding of the recipient’s preferences and passions. With the growing popularity of high performance computing for gaming, streaming, and creative workloads, a personalized build shows thoughtfulness and intent. For those unsure of where to start, a well-researched custom PC gift guide can ease the process and inspire confidence. It outlines suitable configurations based on user profiles, ensuring your gift isn’t just appreciated; it’s remembered for years to come.
Additionally, a custom PC offers far more flexibility than off-the-shelf models. Whether it’s selecting a case with aesthetic flair, installing a GPU that matches AAA game demands, or choosing storage that optimizes load times, customization enhances both performance and style. Combine this with christmas computer deals that bring high-end components into a more affordable range, and the appeal of custom builds becomes crystal clear.
Building a Holiday Gaming PC: Performance Meets Festive Fun
The holidays are the ideal time to invest in a holiday gaming PC build. With blockbuster titles launching in November and December and digital storefronts offering deep discounts, gamers need machines that can keep up. A holiday gaming rig should balance graphical fidelity, smooth framerates, and thermal efficiency. During this time, component prices often drop, creating a sweet spot between price and performance that’s difficult to match at any other time of year.
Popular builds this season are focusing on GPUs like the NVIDIA RTX 4070 and AMD RX 7800 XT, offering excellent ray tracing and DLSS performance. Coupled with CPUs such as the AMD Ryzen 7 7800X3D or Intel Core i7-14700K, these systems provide high performance computing for both gaming and multitasking. Fast DDR5 RAM, NVMe Gen 4 SSDs, and intelligent cooling solutions round out the package, ensuring your machine stays responsive and future-proof.
What really sets a holiday gaming build apart is the immersive experience it delivers. Whether you’re exploring massive open worlds or competing in high-stakes multiplayer matches, the right setup elevates the joy of gaming. The holiday season only intensifies this magic, making it the best time to level up your hardware.
Budget PC Builds That Don’t Compromise on Quality
Not everyone needs a top-tier monster machine, and that’s where budget PC builds come into play. These systems prove that affordability doesn’t mean sacrificing quality or capability. For casual gamers, students, or families looking for their first PC, budget builds offer the ideal blend of performance and practicality.
Entry-level configurations this Christmas are harnessing the value of components like the AMD Ryzen 5 5600G or Intel Core i5-12400, which deliver excellent 1080p performance at a lower cost. Paired with budget-friendly GPUs like the NVIDIA GTX 1660 Super or Radeon RX 6600, users can enjoy solid gaming and multitasking without exceeding financial limits. Thanks to seasonal discounts and bundles, even these builds can feel like luxury gifts under the tree.
But value isn’t just about price; smart component selection makes all the difference. Choosing a reliable PSU, motherboard with upgrade potential, and quality memory ensures that even an economical system performs smoothly and can be expanded down the line. For many, a budget build isn’t just a starting point; it’s a launchpad into the PC world.
The Importance of Smart Component Selection
One of the most vital parts of any custom PC is smart component selection. Choosing the right parts ensures compatibility, longevity, and the performance needed to meet specific goals. Whether building for gaming, creative workloads, or general productivity, understanding which parts offer the best return on investment is key.
For instance, selecting a CPU with the right number of cores and threads can dramatically improve gaming and rendering tasks. Matching it with a capable cooler prevents thermal throttling, preserving performance over time. GPU selection must reflect the display resolution and frame rate targets; there’s no sense overspending if the monitor can’t keep up. Similarly, investing in fast SSD storage instead of a slower HDD means faster boot times and load screens, which improves the overall user experience.
Even aesthetics play a role. RGB lighting, case windows, and color-coordinated components can transform a PC from a machine into a centerpiece. Customization isn’t just about performance; it’s also about pride in ownership. With many christmas computer deals including discounts on peripherals and accessories, it’s possible to create a fully immersive environment tailored to the user’s style.
Getting It Built and Delivered: Why PC Assembly Service Matters
The holidays can be hectic, and not everyone has the time or confidence to assemble a PC from scratch. That’s where a professional PC assembly service becomes invaluable. These services not only ensure the build is completed with expert precision, but they also eliminate the risk of mistakes that could damage expensive components.
When ordering a custom PC as a gift, timing is everything. A deadline guarantee ensures your system is built, tested, and delivered in time to place it under the tree. Reputable builders take holiday cutoffs seriously and often provide clear scheduling options that give peace of mind during this busy season.
Using a PC assembly service means the final product arrives fully functional, cable-managed, and ready to go out of the box. It’s an ideal option for those gifting to someone who may not be tech-savvy or for buyers who simply want to avoid the hassle. Most importantly, professional assembly ensures optimal thermal design and stress testing, maximizing both performance and lifespan.
Whether you’re a seasoned gamer upgrading your setup or a parent giving the gift of gaming to a child, trusting the experts makes the process smoother and more enjoyable. When paired with component warranties and customer support, it becomes a stress-free solution tailored for the season.
Conclusion
This Christmas, a custom PC build is more than just a piece of technology; it’s a gateway to creativity, entertainment, and joy. Whether you’re focused on crafting a high-end holiday gaming PC build or searching for budget pc builds that still impress, the options this season are both diverse and exciting. With proper component selection, guided by a reliable custom PC gift guide, you can ensure every part of the machine fits perfectly into its intended use case.
Don’t forget the advantages of using a pc assembly service, especially with the looming need for a deadline guarantee to get systems built and delivered before the big day. And with christmas computer deals flooding the market, now is the perfect time to make the most of your investment.
In the spirit of giving and gaming, a custom-built PC combines performance, personalization, and lasting value, making it the ultimate gift for the holiday season.
Need Computer Services Near You?
Here at B & L Custom Computers, we specialize in creating custom-built computers to meet the unique needs of our customers. With 18+ years of experience, we also offer high-quality newly built & refurbished computers that look and perform like new. Our services extend beyond sales to include computer repairs, upgrades, data migration, and recovery. Whether you need a new computer, a repair, or help with virus removal or spamware, our experienced team is here to provide expert assistance. Contact us today to learn more about what we can do for you!
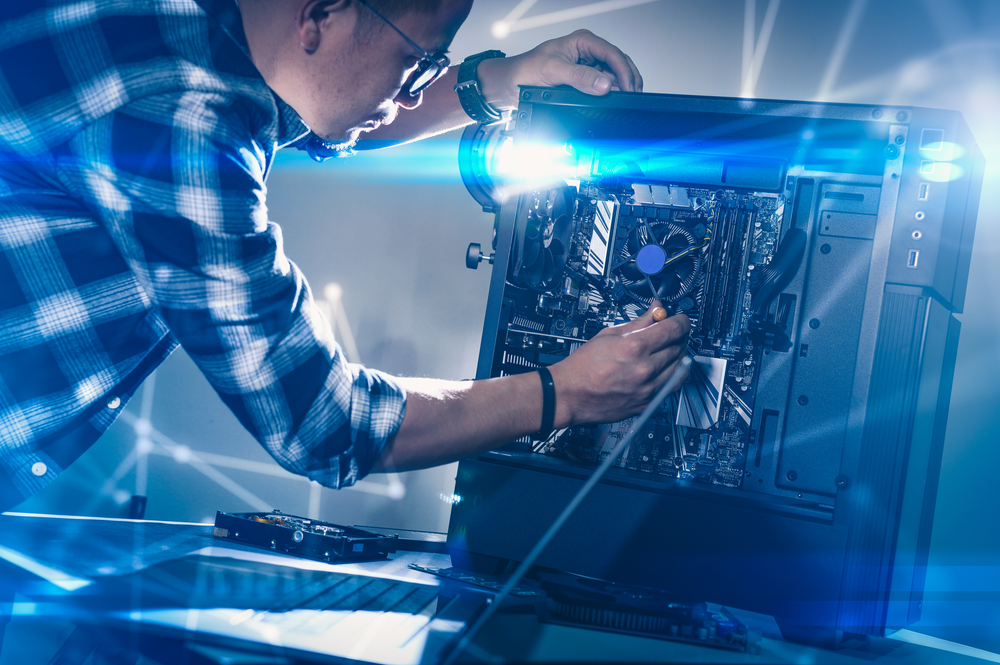
Building your own PC can be one of the most rewarding experiences for any tech enthusiast. The thrill of piecing together components and customizing every detail of your rig is matched only by the satisfaction of booting it up for the first time. However, proper planning and preparation are essential. Rushing in without a game plan or neglecting critical checks can lead to frustration or worse, hardware failure.
One of the best places to start is with a component compatibility check. This step ensures that the CPU fits the motherboard socket, the RAM is the correct type and speed, the graphics card fits in your case and doesn’t conflict with the power supply, and so on. Skipping this can lead to scenarios where you’re stuck with incompatible hardware, wasting both time and money.
Once compatibility is confirmed, consider your workflow. A sequential installation plan will help you avoid unnecessary disassembly. Installing the CPU, RAM, and cooler on the motherboard before placing it in the case can simplify the process. Similarly, adding storage devices and fans before the GPU can give you more room to work.
Thorough planning not only avoids rookie mistakes but also makes the entire experience smoother and more enjoyable. In a DIY PC build, preparation truly is half the battle.
The Silent Killer: Ignoring Anti-Static Precautions
One of the most underestimated threats during a PC build is static electricity. Components like CPUs, motherboards, and RAM are highly sensitive to electrostatic discharge (ESD). A small zap that you might not even feel could irreparably damage these delicate parts.
Taking proper anti-static precautions should be standard practice. At a minimum, work on a non-conductive surface and ground yourself regularly. Using an anti-static wrist strap that clips to a grounded metal object is even better. Touching the metal case or power supply (plugged in but turned off) can also help discharge any built-up static.
Some builders ignore these precautions entirely, thinking the risk is minimal. But the cost of replacing a fried motherboard or CPU makes such negligence an expensive gamble. Taking a few extra seconds to ground yourself is a small price for peace of mind.
When handled correctly, ESD is a non-issue. But when overlooked, it can silently ruin a build that would otherwise be flawless.
Cable Management: Beyond Just Looks
While many beginners view cable management as an afterthought or a purely aesthetic consideration, it plays a crucial role in a PC’s functionality and longevity. Poorly routed cables can obstruct airflow, making cooling less effective and leading to higher internal temperatures. They can also interfere with moving parts like fans, increasing wear or even causing damage.
Well-executed cable management not only improves airflow but also makes maintenance and upgrades easier. When cables are organized and secured, identifying and replacing components becomes a far less daunting task. It also reduces the risk of snagging or accidentally disconnecting something.
On the flip side, failing to manage cables properly can lead to issues like inadequate cooling, which compromises performance and accelerates component wear. High GPU and CPU temperatures may cause thermal throttling or sudden shutdowns, especially in compact cases with limited ventilation.
Investing the time to properly route and secure cables during the build can save you countless headaches down the road. It’s an investment in both aesthetics and system health.
What Not to Do: Bad Habits That Could Ruin Your Build
Despite your best intentions, certain habits can lead to irreversible damage or severely limit your PC’s performance. One of the most harmful mistakes is forcing connectors. Every cable, port, and slot in a PC is designed to fit in only one orientation. Forcing a connector that doesn’t seem to fit can bend pins, crack ports, or short-circuit components. If something doesn’t slide in easily, it’s a sign to double-check compatibility and alignment.
Another frequent misstep is ignoring manuals. Each component comes with a guide for a reason. Motherboards, for example, have very specific layouts for RAM slots and front panel connectors. Assuming you know where everything goes or relying solely on memory from a YouTube video can result in misconfigured systems that fail to boot or perform poorly.
Power supply overload is another common pitfall, particularly when upgrading or overclocking. A 450W unit might seem sufficient initially, but if you’re adding a powerful GPU or multiple drives, that wattage can quickly become insufficient. Running a system close to or beyond a power supply’s limits not only causes instability but also risks complete system failure. Always opt for a quality power supply with headroom for future upgrades.
These bad habits can turn an exciting build into a frustrating and expensive ordeal. Avoiding them is crucial for a successful and stress-free experience.
Precision Matters: Applying Thermal Paste and Cooling Properly
Thermal regulation is one of the cornerstones of a healthy PC. At the heart of this is thermal paste application. This often-overlooked detail plays a vital role in transferring heat from the CPU to the cooler. Applying too little can create air pockets that hinder heat transfer, while applying too much can cause overflow, potentially damaging the motherboard or shorting other components.
The goal is a thin, even layer that ensures maximum contact between the CPU and the cooler. A small pea-sized amount in the center of the CPU is typically sufficient, though the exact method can vary slightly depending on the cooler’s contact plate design.
Cooling doesn’t stop at the CPU. Proper airflow within the case is essential to avoid inadequate cooling, which can degrade performance and reduce component lifespan. Intake and exhaust fans should be positioned to promote continuous airflow across heat-sensitive areas like the GPU, VRMs, and storage drives.
Monitoring temperatures after completing the build can help ensure everything is functioning correctly. If you notice unusually high temperatures, it’s worth revisiting the thermal paste application and overall airflow setup.
When precision is prioritized, thermal performance follows. It’s a vital aspect of any PC build that deserves careful attention.
Conclusion
Building your own PC can be a thrilling endeavor filled with opportunities for customization and learning. When done right, it results in a machine that’s not only powerful but also tailored specifically to your needs. However, the process demands more than just enthusiasm. It requires attention to detail, patience, and a willingness to follow best practices.
Starting with a solid plan, such as conducting a thorough component compatibility check and following a logical, sequential installation, sets the foundation for success. Taking anti-static precautions protects your investment from invisible threats, while good cable management promotes longevity and efficient cooling.
On the other hand, avoiding pitfalls like forcing connectors, overloading the power supply, or neglecting cooling systems can save you from costly mistakes. Perhaps most importantly, following the guidance provided in component manuals and ensuring proper thermal paste application shows that you take the process seriously.
Every PC builder starts somewhere, and even seasoned professionals occasionally make mistakes. But by staying informed and disciplined, you can sidestep the worst practices and build a machine that performs brilliantly for years to come.
Need Computer Services Near You?
Here at B & L Custom Computers, we specialize in creating custom-built computers to meet the unique needs of our customers. With 18+ years of experience, we also offer high-quality newly built & refurbished computers that look and perform like new. Our services extend beyond sales to include computer repairs, upgrades, data migration, and recovery. Whether you need a new computer, a repair, or help with virus removal or spamware, our experienced team is here to provide expert assistance. Contact us today to learn more about what we can do for you!
Building your own gaming pc can feel like an exciting adventure—half puzzle-solving, half tech magic. Whether you want to experience ultra-smooth gameplay at high frame rates or simply have a machine tailored to your exact needs, learning how to get started on a gaming pc build is an investment in both performance and personal satisfaction. For many gamers, the process isn’t just about assembling hardware; it’s about creating a system that represents their style, preferences, and future ambitions in gaming. In this guide, we’ll explore everything from where to start with new parts for a gaming pc to the subtle tips and tricks that make the difference between a good build and a great one.
The Core Components of a Gaming PC
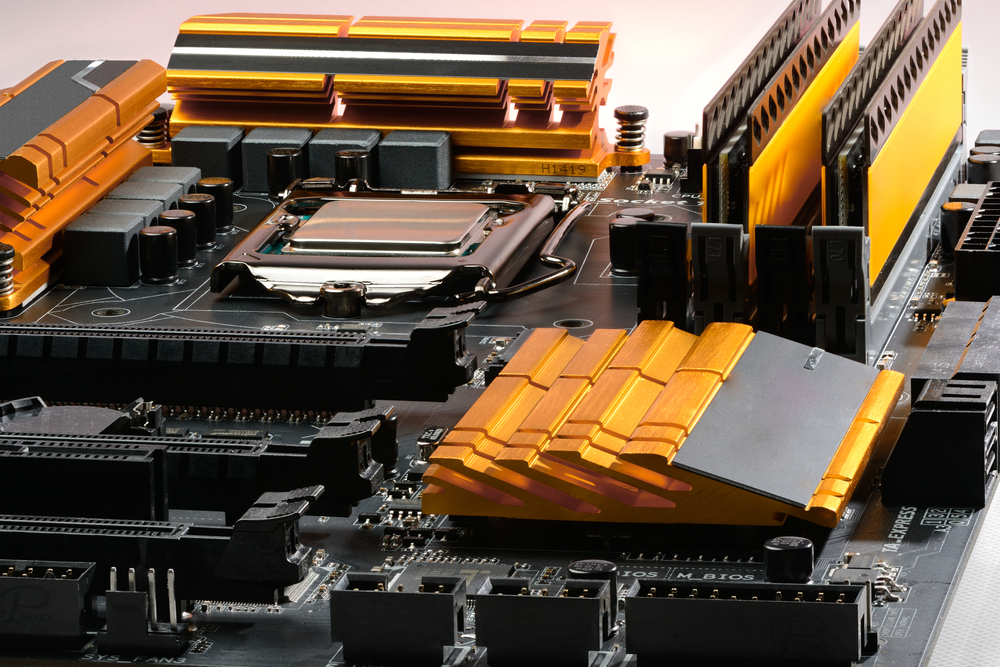
When it comes to assembling a gaming pc, understanding each core component’s role is essential before you even pick up a screwdriver. At the heart of the system is the central processing unit (CPU), which acts as the “brain” of your machine. For gaming, a CPU with strong single-core performance is often more important than sheer core count—although modern titles increasingly benefit from multi-threading. Pairing the right CPU with your graphics processing unit (GPU) is crucial, as the GPU is responsible for rendering the visuals that make games immersive. This is where most of your budget will often go, and for good reason: a powerful GPU can breathe life into games at higher resolutions and settings.
The motherboard is the backbone, connecting every part together. Its chipset and form factor will dictate what CPUs you can use, how much RAM is supported, and what future upgrades are possible. Random access memory (RAM) plays a significant role in smooth performance, with 16GB being the modern baseline for gaming, while 32GB is becoming common for future-proofing and multitasking. Then there’s storage—solid state drives (SSDs) have revolutionized load times, making them a must-have for gamers who want near-instant transitions between game worlds.
Don’t overlook the power supply unit (PSU). A reliable, efficient PSU ensures stable power delivery and longevity for your components. Aim for a unit with an 80 Plus Bronze certification or higher, and always allow for extra wattage above your current needs to support upgrades down the line. Finally, your case not only houses everything but also affects airflow, noise levels, and ease of building. The best case is one that balances style with functionality, offering good cable management options and adequate cooling.
Understanding these parts upfront makes it easier to decide where to allocate your budget, how to match components, and how to avoid bottlenecks that could hinder your gaming experience.
Where to Start With New Parts for a Gaming PC
If you’re wondering where to start with new parts for a gaming pc, the first step is defining your goals. Ask yourself what types of games you want to play and at what settings. Competitive esports titles like Valorant or CS2 require strong CPU performance and high refresh rates, while AAA open-world games lean heavily on the GPU for rich graphics and complex environments. Your choices will also depend on whether you’re targeting 1080p, 1440p, or 4K resolution.
Once you’ve set performance expectations, create a budget. While it’s tempting to splurge on the most powerful parts, balance is key. Spending disproportionately on a GPU while skimping on the CPU can cause performance imbalances, and the same applies in reverse. Use part compatibility tools online to make sure your selected components work together, and check for potential size or clearance issues—especially with larger GPUs and CPU coolers.
Another important consideration is future-proofing. Choosing a slightly more advanced CPU platform or motherboard now might save you from replacing the entire system sooner. For example, opting for a motherboard that supports PCIe 5.0 or DDR5 RAM ensures compatibility with upcoming hardware generations. Also, don’t underestimate the value of a good cooling solution, whether that’s air or liquid cooling. Keeping temperatures low can maintain performance over time and extend the life of your parts.
Research is your best friend at this stage. Read benchmark reviews, watch build guides, and look at how your preferred games perform with the components you’re considering. This early groundwork ensures you’re making smart choices and getting the most out of every dollar you spend.
Tips and Tricks for a Smooth Build Process
Even if you’ve selected the perfect components, the build process itself can present challenges—especially for beginners. One of the most important tips and tricks is to prepare your workspace before you begin. Have all your tools ready, including a good screwdriver, thermal paste if your cooler doesn’t come pre-applied, and an anti-static wrist strap to protect delicate electronics from static discharge.
Follow a logical assembly order. Many builders start by installing the CPU, RAM, and cooler onto the motherboard before placing it in the case. This makes it easier to access sockets and secure components without the cramped conditions of a fully assembled case. Routing cables as you go can also save headaches later and improve airflow, which is critical for cooling performance.
Patience is a virtue here. Rushing increases the risk of mistakes like bent CPU pins or improperly seated RAM. Always double-check that cables are securely connected, especially the CPU power cable, which is often overlooked. For first-time builders, it’s worth having a video tutorial on hand that uses the same or similar components.
After assembly, the first boot is a thrilling moment—but be ready for troubleshooting. If the system doesn’t power on, recheck all connections, consult your motherboard’s diagnostic LEDs or beep codes, and verify that the PSU switch is set to “on.” Sometimes, the simplest solutions—like reseating a loose RAM stick—solve the problem.
Cable management is both an art and a science. Not only does tidy cabling make your build look professional, but it also improves airflow and makes future upgrades easier. Use zip ties or Velcro straps to bundle cables and route them through the case’s dedicated channels.
Optimizing and Maintaining Your Gaming PC
Once your gaming pc is up and running, the work doesn’t stop. Optimization and maintenance are key to getting the best performance over the long term. Begin by updating all drivers—especially for the GPU—since new versions can significantly improve game performance and stability. Your motherboard’s BIOS may also benefit from an update to improve compatibility and fix known issues.
Adjust in-game settings based on your hardware’s capabilities. Even a top-tier GPU might need fine-tuning for ultra-demanding games, especially at higher resolutions. Experiment with settings like texture quality, shadows, and anti-aliasing to find the best balance between visuals and frame rate.
Cooling is another ongoing concern. Keep your system clean by regularly dusting out fans and filters. Dust buildup can choke airflow and raise component temperatures, which can lead to thermal throttling or reduced lifespan. Many builders clean their PCs every three to six months, depending on the environment.
For storage management, periodically uninstall games or programs you no longer use to free up space and keep your SSD from getting too full, as performance can degrade when it’s nearly maxed out. You can also enable features like Windows Game Mode to prioritize gaming performance and minimize background processes.
Finally, monitor your system’s health using software tools. Tracking temperatures, fan speeds, and CPU/GPU usage can help you spot issues early—before they affect your gameplay. By keeping your gaming pc in top condition, you ensure it delivers smooth, reliable performance for years to come.
The Joy of Customization and Upgrading
One of the most rewarding aspects of building a gaming pc is the ability to customize and upgrade over time. Unlike pre-built systems, a custom build allows you to swap out parts as new technology emerges, keeping your system current without starting from scratch. Whether it’s upgrading your GPU for the latest blockbuster titles or adding more RAM for multitasking, your pc can evolve with your needs.
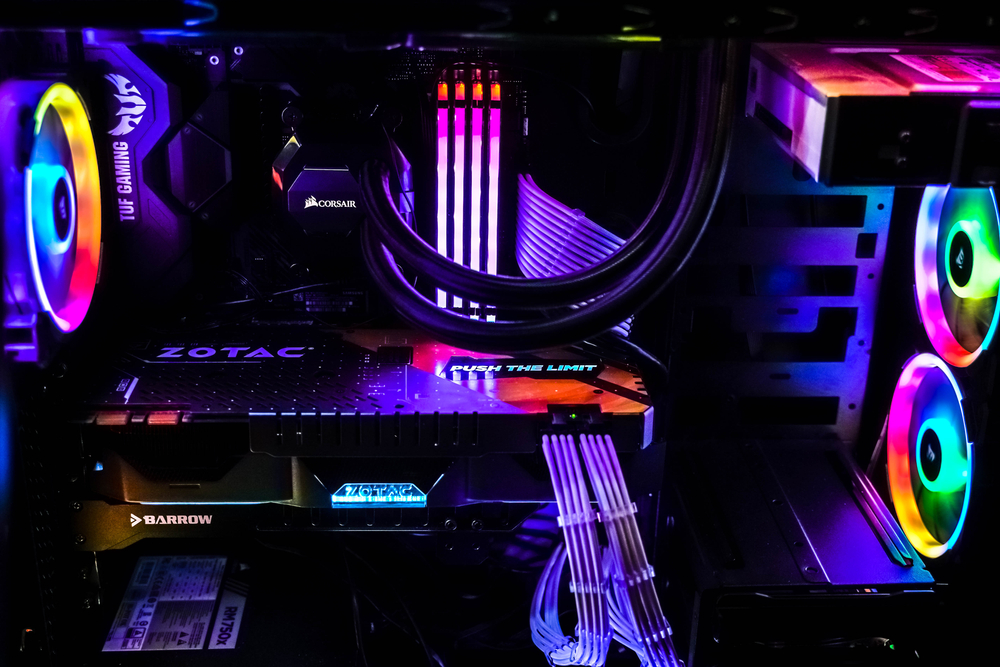
Customization extends to aesthetics as well. Many builders enjoy adding RGB lighting, themed cables, or even custom water-cooling loops to give their rig a unique look. Cases with tempered glass panels turn your pc into a showcase piece, while software-controlled lighting lets you match your setup’s mood or game theme.
Overclocking is another avenue for performance enthusiasts. By carefully increasing the operating speeds of your CPU or GPU, you can squeeze out extra performance—though it requires good cooling and some technical know-how. Done responsibly, it’s a fun way to maximize your investment.
Upgrades don’t always have to be major. Swapping in a faster SSD, adding extra fans, or improving cable management can all enhance your overall experience. And because you’ve built the system yourself, you’ll have the confidence to tackle these changes without fear.
This flexibility and personalization are what make building your own gaming pc so appealing. It’s more than just a machine; it’s a project that grows with you, adapting to both the gaming industry’s evolution and your personal preferences.
Conclusion
Building a gaming pc is as much about the journey as the destination. From understanding each component’s role to knowing where to start with new parts for a gaming pc, every decision shapes the final performance and feel of your system. Applying practical tips and tricks during the build process not only makes assembly smoother but also sets you up for easier maintenance and upgrades in the future.
The ability to tailor your rig to your exact needs—both in performance and aesthetics—creates a sense of ownership and pride that’s hard to match with pre-built systems. Plus, the knowledge you gain along the way empowers you to optimize, troubleshoot, and enhance your pc for years to come.
Whether you’re a first-time builder eager to learn how to get started on a gaming pc build or a seasoned enthusiast chasing the perfect setup, the key is to enjoy the process, embrace the challenges, and appreciate the flexibility a custom-built system offers. With the right planning, patience, and passion, your gaming pc will be more than a tool for entertainment—it will be a reflection of your dedication to the games you love.
Need Computer Services Near You?
Here at B & L Custom Computers, we specialize in creating custom-built computers to meet the unique needs of our customers. With 18+ years of experience, we also offer high-quality newly built & refurbished computers that look and perform like new. Our services extend beyond sales to include computer repairs, upgrades, data migration, and recovery. Whether you need a new computer, a repair, or help with virus removal or spamware, our experienced team is here to provide expert assistance. Contact us today to learn more about what we can do for you!