As the flowers bloom and the weather warms, many people take this time to embark on new projects, and one of the most exciting ones for tech enthusiasts is building a new PC. Spring-time PC building offers the perfect opportunity to update your system with the latest technology and enjoy the improvements that come with fresh, high-quality components. Whether you’re a seasoned builder or a newcomer, the season presents a chance to refresh your setup and optimize your gaming or work experience with new PC parts in spring.
Why Spring is the Ideal Time for PC Building
Spring is a transitional time, both in nature and in the tech world. As new technologies are released and manufacturers update their product lines, the spring months often see a flurry of new PC parts hitting the market. This is particularly beneficial for those looking to upgrade or build a PC with the latest and greatest hardware. While the winter months are traditionally associated with product releases, spring brings a second wave of refreshes, often at more competitive prices as retailers clear out older stock. Additionally, spring is an excellent time to make improvements to your PC without the rush that accompanies holiday season sales. For those who love to build, spring offers an opportunity to design a system that can handle the demands of both current and upcoming software, games, and workloads.
Spring-time PC building is especially appealing because of the wider availability of newer, more efficient components. For example, graphics card manufacturers may release mid-year refreshes with better performance or lower power consumption, and processor manufacturers often introduce new generations during these months. These releases are accompanied by software and firmware updates that help ensure your system performs optimally, giving you a stable and smooth user experience. Additionally, the spring months tend to be quieter in terms of industry announcements, allowing builders to carefully evaluate new products without the pressure of competing trends or high demand.
Upgrading Your PC Hardware in Spring
When it comes to PC hardware updating, spring offers an ideal time to evaluate your current setup and decide which components need an upgrade. Whether you’re looking to replace a single part or perform a complete overhaul, the spring months are typically when you’ll find a balance of new hardware offerings, discounts on older models, and seasonal sales promotions. One of the first things you may consider when updating your PC hardware is the central processing unit (CPU). A new CPU can dramatically improve system performance, particularly for tasks such as gaming, video editing, and 3D rendering.
Alongside the CPU, upgrading your graphics card (GPU) is one of the most impactful changes you can make. With new GPU models arriving regularly, spring often sees the launch of cards that outperform their predecessors while being more power-efficient. For those who want to maximize performance, investing in the latest GPU can significantly enhance the gaming experience or improve rendering speeds for professionals. Additionally, spring-time is an excellent period to focus on your PC’s memory and storage. Solid-state drives (SSDs) and faster memory modules become more affordable each year, and spring sales often provide the perfect opportunity to add more RAM or a larger SSD to your system.
When updating your PC in spring, don’t overlook the importance of cooling and power supply. A good cooling solution ensures that your new components run smoothly and remain at optimal temperatures, which can prolong their lifespan and maintain their performance. Spring is a great time to research and invest in upgraded cooling systems, such as liquid cooling solutions or high-performance air coolers. Likewise, power supplies are often forgotten in upgrades, but they are critical in providing stable and efficient power to your system. Choosing a power supply that can handle your new hardware is essential for a reliable build.
The Joy of Building Your PC in Spring
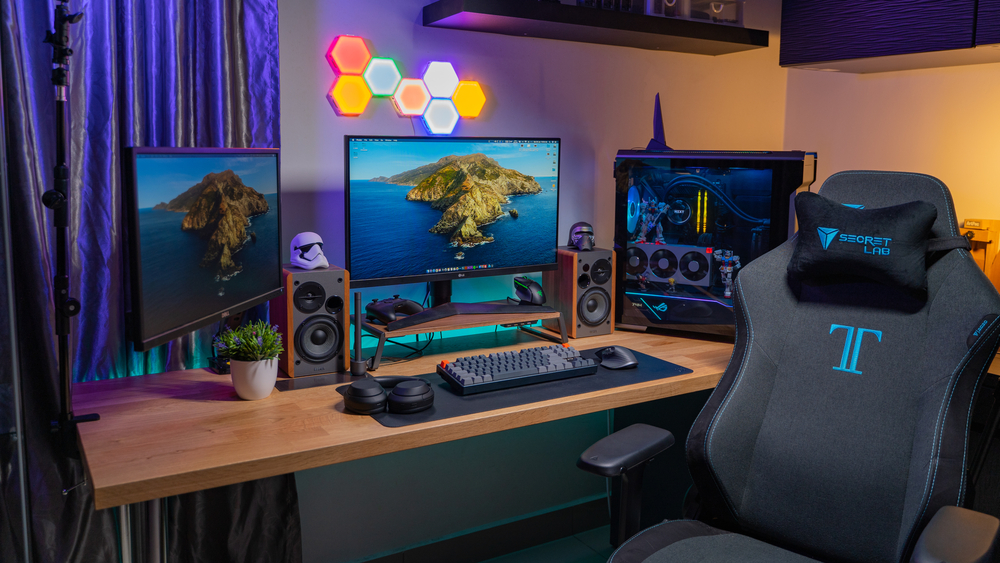
PC building is an incredibly rewarding experience. It’s a chance to customize your system, ensuring that every part meets your personal preferences and needs. The satisfaction of assembling a computer with your own hands is unmatched, and building in the spring makes it even more enjoyable. The calm and energy of the season often creates the perfect environment for focusing on such a technical and creative project. Whether you’re constructing a high-end gaming rig, a workstation for video editing, or a simple setup for everyday tasks, spring’s relaxed pace allows you to spend quality time researching, planning, and assembling your dream machine.
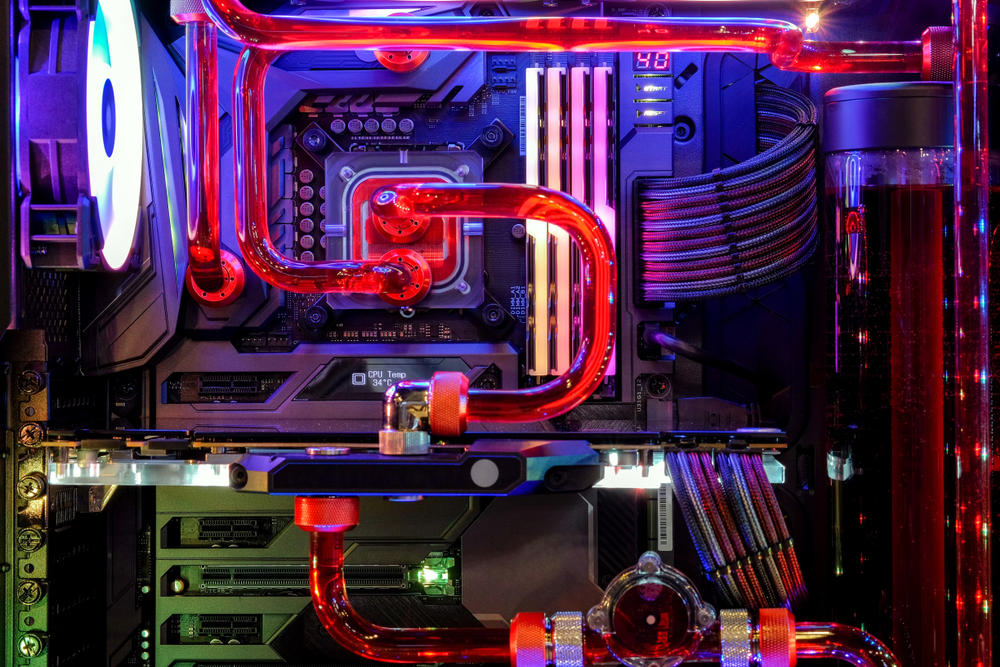
Building a PC in the spring gives you the opportunity to take full advantage of the latest trends in PC hardware design. Aesthetic appeal, for instance, is an important aspect of modern builds, and spring-time often brings fresh trends in case designs, lighting, and cable management. Many builders take pride in creating visually striking setups, which can add another layer of excitement to the process. From RGB lighting to custom water cooling loops, the spring months provide ample inspiration to make your build unique.
Another reason spring is an ideal time for building is the availability of educational content and community support. During this time, tech communities are buzzing with excitement as new hardware is released. This offers an opportunity to learn about the latest technologies and improvements and connect with like-minded individuals. Whether you’re reading reviews, watching tutorials, or browsing forums, you’ll find plenty of resources to help guide you through the process of selecting and assembling your PC parts.
New PC Parts in Spring: What to Look Out For
When searching for new PC parts in spring, it’s important to stay informed about the latest hardware releases and technological advancements. Spring typically brings new generations of components that promise improved performance, efficiency, and features. For example, many of the best motherboard manufacturers release new boards in the spring, incorporating the latest chipsets and features such as PCIe 4.0 or PCIe 5.0 support. These advancements allow for faster data transfer rates, which is crucial for ensuring that your components, like GPUs and SSDs, work at their maximum potential.
Alongside motherboards, CPUs and GPUs are key components that undergo significant improvements in spring. In the case of processors, spring often marks the release of the latest generation from companies like Intel and AMD. These processors can offer better clock speeds, more cores, and improved performance per watt, giving your build a noticeable boost. On the GPU front, Nvidia and AMD frequently release refreshed models with better performance and reduced power consumption. These upgrades can result in better gaming performance and higher frame rates for demanding applications.
When building a PC, it’s important to pay attention to the storage options available. Solid-state drives have become the norm for modern builds, offering high speeds and reliability. In the spring, you’ll find that new SSD models come with increased storage capacities and faster read/write speeds, making them perfect for gaming setups or intensive workflows. NVMe drives are especially popular, offering even faster speeds compared to traditional SATA SSDs.
Additionally, as technology progresses, newer memory types such as DDR5 RAM are becoming more common in high-end builds. If you’re looking to future-proof your system, opting for DDR5 memory might be a wise investment, especially since it’s expected to play a more significant role in the coming years. Similarly, spring is the time to invest in better cooling solutions, particularly if you plan on overclocking your CPU or GPU. Improved air and liquid cooling options hit the market, offering more efficiency and quieter performance.
Why Spring is the Best Season for Planning a Long-Term Build
Finally, when building or upgrading a PC in spring, it’s important to think about the long-term implications of your choices. Spring is an excellent time for planning builds with longevity in mind, particularly since hardware cycles can be unpredictable. By building your system in the spring, you give yourself a head start on making informed decisions about which parts will provide the best value over time. With new product releases and seasonal price drops, you can build a machine that will remain relevant for years to come without constantly needing to upgrade.
Building in spring also offers the chance to take advantage of manufacturer warranties and support. Many companies release extended warranties or special offers during spring promotions, which can provide peace of mind and extra value when purchasing components. The stability and predictability of these offers can help you feel confident that you’re investing in a build that will serve your needs for a long time.
Conclusion
Spring offers a unique and ideal environment for PC building, with a fresh slate of hardware releases, seasonal discounts, and a welcoming atmosphere for new projects. Whether you’re upgrading specific components or building an entirely new machine, the spring months provide ample opportunities for achieving a high-performance PC that can handle the demands of today and tomorrow. As you prepare to take on your next PC building adventure, remember that spring is the perfect time to set your sights on new possibilities and get your system ready for the future.
Need Computer Services Near You?
Here at B & L Custom Computers, we specialize in creating custom-built computers to meet the unique needs of our customers. With 18+ years of experience, we also offer high-quality newly built & refurbished computers that look and perform like new. Our services extend beyond sales to include computer repairs, upgrades, data migration, and recovery. Whether you need a new computer, a repair, or help with virus removal or spamware, our experienced team is here to provide expert assistance. Contact us today to learn more about what we can do for you!
Gaming PCs are an investment in entertainment and performance. As technology evolves, so does the need for upgrades and replacements. A gaming PC typically comprises several parts that work together to deliver an immersive gaming experience. However, over time, these parts can wear out or become outdated, affecting the performance of your system. But how do you know when to replace your gaming PC parts? This blog will guide you through the signs that indicate it’s time for an upgrade, ensuring that your gaming experience stays optimal for years to come.
Understanding the Lifespan of Gaming PC Parts
The lifespan of your gaming PC’s components can vary significantly based on how frequently you use them and how well you maintain them. Typically, gaming PCs are designed to last several years, but this can depend on the individual parts. The key to determining when to replace parts is to understand the typical lifespan of these components.
For example, a high-quality graphics card can last anywhere between 3 to 5 years before it starts showing signs of aging. A motherboard can last much longer, often upwards of 7 years, though this depends on its quality and the kind of components you pair with it. The processor (CPU) has an even longer lifespan, often lasting 5 to 10 years, though advancements in gaming technology and processing power may prompt earlier replacements. The storage devices, such as hard drives or solid-state drives (SSDs), typically need replacement every 4 to 5 years, depending on usage. While some components may have a long life, they may still need replacing when new technologies demand higher performance.
Signs That Indicate It’s Time for Replacement
Your gaming PC might start showing signs that certain components are underperforming or failing. While you might not need to replace parts immediately, these symptoms can help you assess the health of your system. If you notice consistent lag, frame rate drops, or stuttering during gameplay, your GPU or CPU might be struggling to keep up with modern games.
Overheating is another common sign that something is wrong. A properly functioning PC should maintain optimal temperatures even under heavy gaming sessions. However, if you notice your system is frequently running hot, even after cleaning out the dust, it could mean that the thermal paste on the CPU has degraded, or the cooling system isn’t functioning as efficiently as it should. If the issue persists, it might be time to consider replacing the cooling system or thermal paste to prevent permanent damage to sensitive components.
Frequent crashes or system instability is another major red flag. If your PC crashes unexpectedly during intense gaming sessions or freezes, it could signal a failing motherboard, RAM, or power supply unit (PSU). These components are essential to the stable operation of your gaming system, and replacing them can resolve many stability issues.
Another key sign to look for is when your system can no longer support newer games or software updates. If you notice that you cannot run the latest games on high settings, or if updates to your favorite games are consistently adding features your system cannot handle, it may be time to upgrade the parts responsible for performance, particularly the GPU and CPU. These upgrades will ensure that your system can keep up with the ever-growing demands of modern gaming.
Knowing When to Upgrade vs. Replace
It’s important to distinguish between upgrading and replacing gaming PC parts. Upgrading involves swapping out certain components to enhance performance without changing the entire system. Replacing parts, on the other hand, usually comes when the component has failed or is no longer worth upgrading.
If your system is starting to show signs of aging but still runs relatively well, an upgrade might be a more cost-effective solution than a full replacement. For example, if your graphics card can no longer handle modern games, replacing just the GPU can breathe new life into your system. Similarly, if your storage is slowing down your gaming experience, swapping out an old hard drive for a fast SSD can dramatically improve boot and load times.
In contrast, if multiple parts are outdated or failing, a full system replacement may be the more practical solution. For example, if your motherboard, CPU, and GPU are all approaching the end of their useful life, trying to upgrade each of these parts individually could cost you more than simply replacing the entire system. A full replacement ensures that all components are compatible and that your system runs smoothly without the bottlenecks that might come from piecemeal upgrades.
The decision between upgrading and replacing depends on how much of your system is outdated and how much you’re willing to spend. If only a few parts are underperforming, a targeted upgrade could be the right choice. However, if your gaming experience is being hampered by multiple outdated parts, a fresh start with new components might be the way to go.
Factors to Consider Before Replacing Your Parts
When you decide to replace your gaming PC’s parts, there are several factors to take into account. Budget is the primary consideration for most gamers. Upgrading specific components may save you money in the short term, but be sure to research whether your current setup can support the parts you want to add. For example, if your motherboard is outdated, upgrading just the GPU may lead to performance bottlenecks, as the motherboard may not be able to fully support a more powerful card.
Compatibility is another important factor. Not all components are compatible with each other, so you’ll need to ensure that any new parts you purchase work well together. For instance, the CPU you want to upgrade to may not be compatible with your existing motherboard, requiring a motherboard replacement as well. When upgrading or replacing parts, it’s essential to research compatibility between the components and ensure that they will work together seamlessly.
Performance requirements are another important consideration. As games become more demanding, the need for powerful components increases. Before deciding which parts to replace, consider the types of games you want to play and the level of performance you desire. If you’re primarily playing less graphically demanding games, you may be able to get by with upgrading only the GPU. However, if you’re aiming to play the latest AAA titles with ultra-high settings, upgrading both the CPU and GPU will provide the best results.
Lastly, future-proofing is something many gamers overlook. When replacing parts, you want to think ahead and ensure that the components you choose will be able to handle future gaming technologies. This means opting for components that are more powerful than what you need right now, ensuring that your system will stay relevant for several years. While it can be tempting to opt for the most budget-friendly parts, investing in higher-end components that will remain competitive in the future will save you money in the long run.
Conclusion
Knowing when to replace your gaming PC’s parts is essential for maintaining a smooth, enjoyable gaming experience. By paying attention to performance issues like lag, stuttering, overheating, and crashes, you can determine whether an upgrade or a full replacement is necessary. Understanding the lifespan of your components, how to assess their health, and knowing when to make the switch will ensure that your gaming rig stays relevant and capable of handling the latest titles. By considering factors like budget, compatibility, and future-proofing, you can make informed decisions that will keep your system running at peak performance for years to come.
Need Computer Services Near You?
Here at B & L Custom Computers, we specialize in creating custom-built computers to meet the unique needs of our customers. With 18+ years of experience, we also offer high-quality newly built & refurbished computers that look and perform like new. Our services extend beyond sales to include computer repairs, upgrades, data migration, and recovery. Whether you need a new computer, a repair, or help with virus removal or spamware, our experienced team is here to provide expert assistance. Contact us today to learn more about what we can do for you!
Building your first gaming PC can be a rewarding experience that not only saves you money but also allows you to customize your rig to fit your specific gaming needs. However, the process can be daunting if you don’t know where to start. In this guide, we’ll walk you through the essential steps, tips for building your first gaming PC, and what to avoid when building your gaming PC to ensure your setup is optimized for performance and longevity.
Why Build a Gaming PC?
Before diving into pc building, it’s important to understand why many gamers prefer building their own rig. Building your own gaming PC allows you to:
Customize performance: You can choose parts that meet your exact specifications, ensuring optimal performance for your favorite games.
Save money: By avoiding the markup of pre-built systems, you can allocate your budget where it matters most.
Learn valuable skills: Assembling a gaming PC gives you hands-on experience with computer hardware, which can be beneficial for troubleshooting and future upgrades.
Essential Components of a Gaming PC
Central Processing Unit (CPU)
The CPU is the brain of your gaming PC. It handles the execution of tasks and is crucial for gaming performance. When choosing a CPU, look for a balance between core count, clock speed, and compatibility with your motherboard.
Graphics Processing Unit (GPU)
The GPU is arguably the most critical component for gamers, as it renders the graphics and impacts the overall frame rate. Popular GPU brands like NVIDIA and AMD offer options ranging from budget-friendly cards to high-performance GPUs for 4K gaming.
Motherboard
The motherboard serves as the backbone of your system, connecting all components. Choose a motherboard that is compatible with your CPU, RAM, and storage preferences while providing sufficient slots for future expansion.
Memory (RAM)
For gaming, 16GB of RAM is considered the sweet spot, though 32GB can future-proof your build. Faster RAM speeds can also boost performance, especially in games that rely heavily on memory.
Storage (SSD vs. HDD)
Solid State Drives (SSDs) are faster than traditional Hard Disk Drives (HDDs) and can significantly reduce loading times. A combination of a smaller SSD for your operating system and frequently played games, alongside a larger HDD for general storage, offers the best of both worlds.
Power Supply Unit (PSU)
A reliable PSU is crucial to avoid system failures and ensure stable performance. Choose a PSU with enough wattage to support your entire build, ideally with an 80+ certification for efficiency.
PC Case
Your PC case houses all the components and impacts airflow and aesthetics. Ensure that your case is spacious enough for your components and allows proper cable management.
Cooling System
Proper cooling prevents overheating and maintains stable performance. You can choose between air cooling (fans) or liquid cooling systems, depending on your budget and desired aesthetic.
Steps for Building Your First Gaming PC
1. Plan Your Build
Before purchasing any components, plan out your build. Research compatibility between parts and make sure your selections fit your budget. Use pc building resources like PCPartPicker to ensure all components work together.
2. Assemble Your Tools
Before starting, gather the following tools:
Screwdriver (magnetic if possible)
Anti-static wrist strap (optional but recommended)
Zip ties for cable management
3. Install the CPU
Start by installing the CPU into the motherboard’s designated socket. Lift the latch, align the CPU according to the indicator, and gently place it in. Avoid applying pressure and secure the latch back into place.
4. Attach the CPU Cooler
If you’re using an air cooler, apply a small amount of thermal paste to the CPU (unless pre-applied), then attach the cooler according to the manufacturer’s instructions.
5. Insert the RAM
Install the RAM sticks into the correct slots. Most motherboards have color-coded slots to help you achieve dual-channel memory configurations.
6. Mount the Motherboard
Carefully place the motherboard inside the PC case, aligning it with the standoff screws. Secure the motherboard using the provided screws.
7. Install Storage Drives
Mount your SSD and/or HDD into the designated slots within the case and connect the necessary SATA cables.
8. Insert the GPU
Insert your GPU into the PCIe slot on the motherboard and secure it in place with screws. Ensure the GPU is fully seated to avoid connection issues.
9. Connect the PSU
Connect the power cables from the PSU to the motherboard, GPU, and storage drives. Make sure to route cables neatly for better airflow.
10. Boot the System
Once all components are installed and connected, it’s time to power on your system. If everything is assembled correctly, you should see your PC booting into the BIOS. From here, you can install your operating system and drivers.
Tips for Building Your First Gaming PC
Check compatibility: Ensure all your components are compatible to avoid costly mistakes.
Avoid cheap power supplies: A high-quality PSU prevents power fluctuations and protects your components.
Invest in cooling: Proper airflow is essential to prevent overheating, especially during long gaming sessions.
Cable management: Neatly organizing cables improves airflow and makes future upgrades easier.
Update BIOS and drivers: Keeping your BIOS and drivers up to date ensures optimal performance.
What to Avoid When Building Your Gaming PC
Skipping Research
Failing to research components can lead to incompatible parts or underwhelming performance. Always double-check specs, reviews, and compatibility.
Ignoring Budget Allocation
Overspending on one component, such as a high-end GPU, while skimping on others like the PSU can lead to system imbalances. Distribute your budget wisely.
Forgetting Thermal Paste
If you’re installing a third-party CPU cooler, don’t forget thermal paste. This ensures proper heat transfer between the CPU and cooler.
Neglecting Upgradability
Avoid choosing parts that limit future upgrades. For example, opt for a PSU with extra wattage and a case with additional expansion slots.
Not Testing Before Final Assembly
Before finalizing cable management, perform a test boot to ensure the system powers on and all components function correctly.
Final Thoughts
Gaming pc building is an exciting journey that allows you to tailor your system to your exact needs and preferences. By following this guide and paying attention to tips for building your first gaming PC, you can create a powerful and efficient machine while avoiding common pitfalls. Remember, patience and preparation are key to a smooth pc building experience. Once your rig is up and running, you’ll enjoy the satisfaction of playing your favorite games on a system you built with your own hands.
Need Computer Services Near You?
Here at B & L Custom Computers, we specialize in creating custom-built computers to meet the unique needs of our customers. With 18+ years of experience, we also offer high-quality newly built & refurbished computers that look and perform like new. Our services extend beyond sales to include computer repairs, upgrades, data migration, and recovery. Whether you need a new computer, a repair, or help with virus removal or spamware, our experienced team is here to provide expert assistance. Contact us today to learn more about what we can do for you!
Replacing parts in your PC can be both exciting and rewarding. Whether you’re upgrading your graphics card for better gaming performance, adding more RAM for multitasking, or replacing a faulty component, working on your computer yourself can save money and boost performance. However, working with PC components requires caution to prevent damage to the hardware or injury to yourself.
In this guide, we’ll cover essential PC parts safety tips and proper PC parts maintenance practices to ensure your upgrade or replacement process goes smoothly and safely.
Preparing Your Workspace
Before you dive into replacing parts in your PC, it’s crucial to prepare a clean, organized, and static-free workspace.
Choose the Right Surface
Avoid working on carpeted surfaces or rugs, as they can generate static electricity, which can harm sensitive PC components. Instead, use a hard, flat surface like a wooden or metal table.
Use Anti-Static Equipment
Static electricity can cause irreparable damage to your PC parts. To protect your components:
Use an anti-static wrist strap to ground yourself while working.
Place an anti-static mat on your workspace to prevent static buildup.
If you don’t have these tools, touch an unpainted metal part of your PC case regularly to discharge static.
Organize Your Tools
Having the right tools ready will make the process smoother and safer. You typically need:
A screwdriver set (preferably magnetic).
A small container to hold screws and tiny parts.
Flashlights or adequate lighting to see all internal components clearly.
By preparing your workspace, you can avoid accidental damage and keep your components organized.
Power Off and Disconnect Everything
Before replacing or upgrading any component in your PC, always ensure that the system is completely powered off.
Shut Down the PC Properly
Save all your work, shut down the PC, and wait until the fans stop spinning. Do not replace parts while the computer is running or in standby mode.
Unplug the Power Cable
After shutting down, disconnect the power cable from the back of the computer. This ensures there’s no power running through the components.
Press the Power Button
Press and hold the power button for about 5-10 seconds after unplugging the power cable. This will discharge any residual power still stored in the capacitors.
Remove Peripheral Devices
To make handling the PC easier and safer, unplug peripherals such as your mouse, keyboard, and external drives.
Ensuring your PC is completely powered down is one of the most critical PC parts safety tips to prevent electric shock or hardware damage.
Handling PC Components Safely
PC components are sensitive to static electricity, mishandling, and excessive force. Here’s how to safely handle your hardware.
Avoid Touching Circuit Boards
Always handle components like the motherboard, GPU, and RAM by their edges. Avoid touching the circuit board or pins, as oil and static from your fingers can damage them.
Protect the CPU
When replacing or upgrading a CPU:
Avoid bending the delicate pins on the processor or motherboard socket.
Always place the CPU in its socket carefully and apply even pressure when securing it.
Secure Components Properly
When installing new parts, ensure they are seated firmly in their respective slots:
For RAM, press firmly until you hear a click.
For GPUs and expansion cards, align them with the slot and secure them with screws.
For storage drives, use screws to prevent rattling or improper alignment.
Always double-check that the components are properly seated and secured to avoid hardware malfunction or damage.
Cleaning Your PC Before Installation
Dust buildup inside a PC can negatively impact performance and longevity. Before replacing any parts, take the opportunity to clean your PC.
Use Compressed Air
Use a can of compressed air to remove dust from fans, heatsinks, and other components.
Hold the fans in place to prevent them from spinning when cleaning.
Wipe Down Surfaces
Use a microfiber cloth to gently clean dust from flat surfaces like the case panels.
Avoid using liquid cleaners, as moisture can damage components.
Check for Debris
Inspect the slots, connectors, and ports to ensure no debris or dust is present before inserting new parts.
Regular PC parts maintenance and cleaning can prolong the life of your components and prevent overheating issues.
Ensuring Proper Ventilation and Cable Management
Proper airflow inside your PC case is essential for keeping components cool and running efficiently.
Position Your Components Carefully
Ensure components like the GPU and CPU cooler are positioned so they don’t obstruct airflow. Larger GPUs can block airflow from front fans, so ensure proper spacing.
Organize Cables
Messy cables can block airflow and make it difficult to access components. Use cable ties to keep cables neat and routed along the sides of the case.
Check Fans and Airflow Direction
Ensure that:
Intake fans are drawing cool air into the case.
Exhaust fans are pushing hot air out of the case.
Good airflow is part of essential PC parts maintenance, preventing overheating and ensuring components last longer.
Testing Your PC After Replacing Parts
Once you’ve installed your new or replacement parts, it’s time to test the PC and ensure everything is functioning correctly.
Double-Check Connections
Before powering on your PC, double-check all connections:
Ensure power cables are securely connected to components like the motherboard, GPU, and drives.
Verify that RAM, GPU, and storage drives are firmly seated.
Boot the System
Power on the PC and check for signs that everything is working:
Listen for any unusual beeping sounds, which could indicate hardware errors.
Ensure the fans are spinning and lights are functioning.
Check BIOS Settings
Sometimes, new components like RAM or storage drives may need to be recognized by the system. Enter the BIOS (usually by pressing Del or F2 on startup) to confirm the new hardware is detected.
Run Stress Tests
After installing parts like a new GPU or CPU, run stress tests to ensure stability and proper performance. Software tools like Prime95 for CPUs and FurMark for GPUs can help verify that everything is functioning correctly.
By testing thoroughly, you can identify and resolve issues early, ensuring your PC runs smoothly.
Final Safety Tips
Here are a few additional PC parts safety tips to keep in mind when replacing components:
Take Your Time: Rushing the process can lead to mistakes, like misaligned parts or broken connectors.
Avoid Force: If a part doesn’t fit, double-check its alignment. Forcing it can cause damage.
Keep the PC Manual Handy: Refer to your motherboard and case manuals for specific installation instructions.
Stay Grounded: Keep static discharge precautions in place throughout the process.
Conclusion
Replacing parts in your PC can greatly improve its performance and lifespan, but safety and precision are key. By following these PC parts safety tips and incorporating regular PC parts maintenance, you can avoid accidents, protect your hardware, and ensure a smooth upgrade process.
Remember to stay organized, work in a static-free environment, and double-check all connections before powering on your system. With the right approach, you’ll enjoy a seamless PC upgrade that meets your needs for gaming, productivity, or everyday use.
Need Computer Services Near You?
Here at B & L Custom Computers, we specialize in creating custom-built computers to meet the unique needs of our customers. With 18+ years of experience, we also offer high-quality newly built & refurbished computers that look and perform like new. Our services extend beyond sales to include computer repairs, upgrades, data migration, and recovery. Whether you need a new computer, a repair, or help with virus removal or spamware, our experienced team is here to provide expert assistance. Contact us today to learn more about what we can do for you!
The holiday season is the perfect time to revamp your gaming or workstation PC. With enticing sales and an array of new components hitting the market, it’s the ideal moment to bring your system up to speed. Whether you’re a seasoned builder or a newcomer, upgrading your PC can enhance performance, improve aesthetics, and extend its lifespan. Let’s dive into the new PC parts to consider for the holidays and what to prioritize in your upgrade list.
Why Upgrade Your PC for the Holidays?
Holidays bring a flurry of deals on PC components, making it the most budget-friendly time to invest in new hardware. Whether your goal is smoother gameplay, faster rendering times, or simply a quieter system, upgrading during this season ensures you get the best value. Additionally, with the release of cutting-edge GPUs, CPUs, and storage options every year, you can future-proof your PC for years to come.
New PC Parts to Consider for the Holidays
Upgrading your PC can be overwhelming with so many options available. Here’s a breakdown of the most impactful components to consider:
1. Graphics Card (GPU)
If you’re a gamer or content creator, the GPU is the heart of your system. This holiday season, new PC parts to consider for the holidays include the latest GPUs from NVIDIA’s RTX 40-series and AMD’s Radeon 7000-series. These GPUs offer significant performance boosts, enhanced ray tracing capabilities, and better efficiency compared to older models.
Key Considerations:
Look for holiday bundles that include free games or software.
Ensure your power supply and case can accommodate the new GPU.
2. Processor (CPU)
Your CPU is critical for multitasking and running demanding applications. The newest CPUs, like Intel’s 14th-gen and AMD’s Ryzen 7000X3D series, deliver exceptional performance gains, especially in gaming and productivity tasks.
Key Considerations:
Match your CPU with a compatible motherboard to unlock its full potential.
Consider CPUs with more cores and threads for tasks like video editing and 3D rendering.
3. Solid-State Drive (SSD)
Storage is often overlooked but upgrading to a fast SSD can drastically reduce load times and improve overall system responsiveness. NVMe SSDs, especially PCIe Gen 4 and Gen 5 models, are new PC parts to consider for the holidays due to their blazing speeds.
Key Considerations:
Prioritize capacity based on your needs; 1TB is a great starting point.
Look for deals on SSDs with faster read and write speeds.
4. Memory (RAM)
Insufficient RAM can bottleneck your system. For gaming and multitasking, 16GB is the baseline, but upgrading to 32GB or 64GB can future-proof your PC.
Key Considerations:
Check your motherboard’s compatibility with higher RAM speeds.
RGB-enabled RAM sticks add a festive touch to your build.
5. Power Supply Unit (PSU)
An often-overlooked component, your PSU powers every part of your PC. A reliable PSU ensures stable performance and protects your hardware from power surges.
Key Considerations:
Opt for a PSU with an 80+ Gold or Platinum efficiency rating.
Ensure the wattage is sufficient for your GPU and CPU upgrades.
6. Cooling Solutions
Efficient cooling keeps your PC running at peak performance. Whether you’re using air or liquid cooling, upgrading your cooling system can reduce noise and improve thermal performance.
Key Considerations:
Consider all-in-one (AIO) liquid coolers for quieter operation and better aesthetics.
Don’t forget thermal paste when replacing your CPU cooler.
7. Monitors
Upgrading your monitor can be as transformative as upgrading your GPU. Look for high-refresh-rate displays (120Hz or higher) for gaming or 4K resolution for productivity.
Key Considerations:
Match your monitor’s resolution and refresh rate to your GPU’s capabilities.
Look for ergonomic options with adjustable stands and reduced eye strain features.
What PC Part to Replace First When Building Your Holiday List
Knowing what to prioritize can save you time and money. Here’s how to decide:
1. Assess Your Current Bottlenecks
Identify the weakest link in your system. If games are lagging, the GPU should top your list. For slow boot times, an SSD upgrade is essential.
2. Start with the GPU
The GPU is often the first part to replace since it delivers the most noticeable improvement in gaming and creative tasks. Pairing a new GPU with an old CPU can lead to bottlenecks, so consider upgrading both if your budget allows.
3. Follow Up with the CPU
Once your GPU is upgraded, ensure your CPU can keep up. A powerful CPU improves frame rates, application responsiveness, and multitasking efficiency.
4. Upgrade RAM and Storage
These upgrades are relatively affordable and offer significant quality-of-life improvements. More RAM enables seamless multitasking, while a faster SSD speeds up file transfers and game loading times.
Tips for a Smooth Holiday PC Upgrade
1. Plan Your Budget
Holiday deals can be tempting, but it’s essential to set a budget. Prioritize upgrades that offer the most noticeable benefits and avoid overspending on unnecessary features.
2. Check Compatibility
Before purchasing, verify that all new components are compatible with your existing hardware. Use tools like PCPartPicker to avoid compatibility issues.
3. Take Advantage of Sales
Black Friday, Cyber Monday, and holiday flash sales are prime opportunities to snag components at discounted prices. Keep an eye on bundles and rebates.
4. Don’t Forget Peripherals
Upgrading peripherals like your keyboard, mouse, and headset can also elevate your PC experience. Look for ergonomic designs and features like customizable RGB lighting.
5. Install Upgrades Carefully
When installing new parts, ensure your PC is powered off and grounded to avoid damaging sensitive components. If you’re unsure, seek help from a professional or consult online guides.
Building a Holiday-Themed PC
For those looking to add a festive touch to their rig, consider customizing your PC with holiday-themed components and accessories:
RGB Lighting: Set your RGB fans, keyboard, and case lights to holiday colors like red, green, or snow white.
Custom Sleeved Cables: Match your PSU cables to the holiday aesthetic.
Festive Decals or Cases: Some manufacturers offer limited-edition holiday-themed cases and accessories.
Future-Proofing Your Upgrades
The tech landscape evolves rapidly, so it’s wise to invest in parts that will remain relevant for years. Look for components with:
Support for the latest standards (e.g., DDR5 RAM, PCIe Gen 5).
Higher performance ceilings to handle future games and software.
Warranty coverage for added peace of mind.
Conclusion
Upgrading your PC during the holidays is an exciting opportunity to boost performance and add a touch of festive cheer to your setup. Start by identifying the components that will make the most significant impact, such as the GPU or CPU, and take advantage of seasonal sales to stretch your budget further. With careful planning and a bit of creativity, you can create a high-performing system that will serve you well into the new year.
Whether you’re gaming, streaming, or working, these tips will ensure your PC is ready for anything. So, make your holiday list, check it twice, and treat yourself to the upgrades you’ve been dreaming of!
Need Computer Services Near You?
Here at B & L Custom Computers, we specialize in creating custom-built computers to meet the unique needs of our customers. With 18+ years of experience, we also offer high-quality newly built & refurbished computers that look and perform like new. Our services extend beyond sales to include computer repairs, upgrades, data migration, and recovery. Whether you need a new computer, a repair, or help with virus removal or spamware, our experienced team is here to provide expert assistance. Contact us today to learn more about what we can do for you!