Computers are intricate machines designed to operate under certain environmental conditions. While they may seem resilient, the truth is that seasonal changes can create unique challenges for your PC. From rising summer heat to the dryness of winter air, every shift in the weather has the potential to influence how your computer functions. Asking does the weather changing affect your pc is not just a theoretical question, it is a real concern for anyone who depends on technology daily.
Heat, humidity, dust, and even static electricity all increase or decrease with the seasons. These factors directly impact sensitive electronic components, including the processor, graphics card, hard drives, and power supply. In fact, seasonal affects on pcs are often subtle but cumulative. A computer may not fail immediately, but prolonged exposure to unfavorable conditions can shorten its lifespan. By understanding the natural patterns of seasonal change, users can take proactive measures to keep their devices safe and efficient.
Many people assume that because computers are kept indoors, they remain unaffected by the outside environment. However, the truth is that indoor climate is closely tied to outdoor weather. Air conditioning, heating systems, and even open windows contribute to the way your PC handles environmental stress. Recognizing these connections is the first step toward ensuring stability throughout the year.
Summer Heat and Performance Concerns
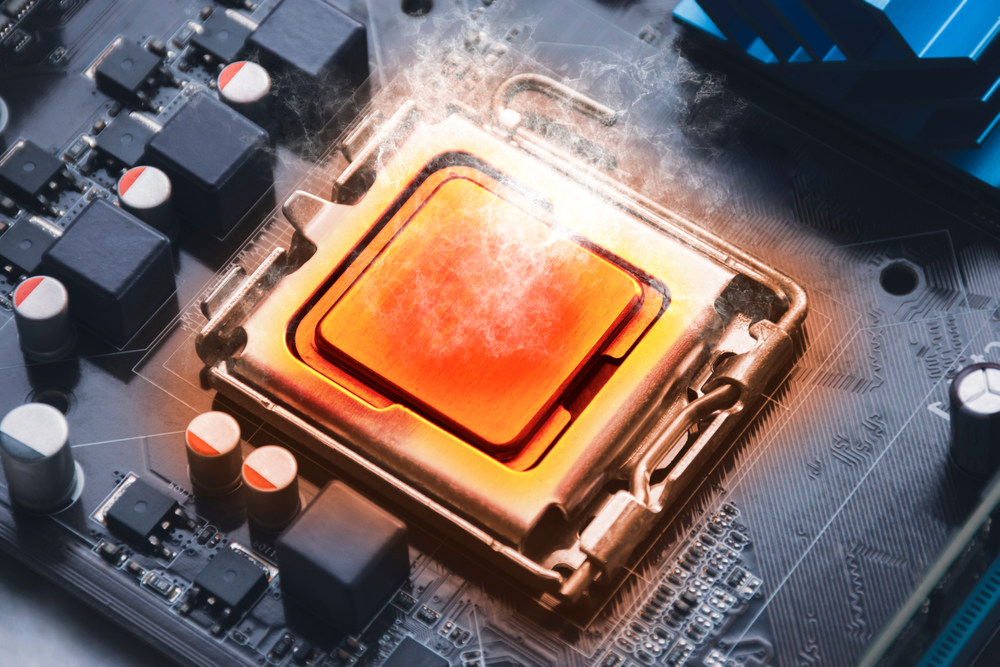
High summer temperatures are one of the most pressing threats to computer performance. Heat is the natural enemy of electronics, and PCs produce plenty of it internally even without seasonal challenges. When outside temperatures rise, the risk of overheating becomes much greater. Fans and cooling systems must work harder, which can lead to increased noise and wear over time.
A common sign of heat stress is when a computer suddenly slows down or shuts off without warning. These issues are often the result of thermal throttling, a built-in safety feature that reduces processing power to lower internal temperatures. In extreme cases, permanent hardware damage can occur if components consistently run too hot. This is why proper ventilation, dust management, and ambient cooling are so critical during the summer months.
The seasonal affects on pcs during summer extend beyond just internal hardware. Power surges from increased use of air conditioning units can also threaten a PC’s stability. Without surge protectors or uninterruptible power supplies, sudden outages or voltage spikes can lead to corrupted data or damaged circuits. Knowing how can you prepare for season changes for your pc becomes particularly vital when summer heat combines with power fluctuations.
Winter Challenges: Cold and Static Electricity
Winter may seem like a season of relief for your PC because colder air helps with cooling, but it introduces other challenges. One of the biggest risks during winter is static electricity. Cold, dry air lacks humidity, which makes it easier for static charges to build up. A simple touch from a person carrying a static charge can discharge electricity into sensitive circuits, potentially destroying them instantly.
Additionally, while cold air helps keep systems cool, sudden temperature shifts can cause condensation. For example, bringing a laptop inside from freezing outdoor conditions can lead to moisture forming on internal components. This condensation can short-circuit the machine if powered on too quickly. Allowing devices to acclimate before use is essential to avoid such risks.
Another overlooked issue is dust circulation from heating systems. Forced-air furnaces often push fine particles into the environment, and PCs easily draw this dust into their fans and vents. Over time, buildup can insulate components, trapping heat and reducing airflow efficiency. Seasonal affects on pcs during winter therefore require as much attention as those in summer, though the risks manifest differently.
Spring and Fall: Transitional Weather and Humidity
The transitional seasons of spring and fall are less extreme than summer or winter, but they bring their own subtle challenges. Humidity is one of the primary environmental shifts during these months. High humidity can create conditions for corrosion on metallic components, while low humidity increases static electricity risks. Finding the right balance of indoor humidity is therefore a key part of PC care during these seasons.
Another seasonal factor during spring is the influx of pollen and outdoor debris. Opening windows to enjoy the fresh air can inadvertently allow particles into the home, many of which settle inside computer systems. This buildup mirrors the effects of dust and can clog cooling fans or coat circuit boards. Routine cleaning is critical during transitional periods to maintain system reliability.
In the fall, cooler nights and warmer days can create condensation cycles, especially in less climate-controlled spaces like basements or garages where some PCs may be stored. Users often overlook these environmental variations, but they play a major role in long-term system health. Asking does the weather changing affect your pc has a clear answer when considering how moisture interacts with delicate electronics.
How Can You Prepare for Season Changes for Your PC
Understanding seasonal challenges is only half of the solution. The real question is how can you prepare for season changes for your pc in a way that prevents damage and extends longevity. Preparation begins with monitoring. Using hardware monitoring software to track temperatures, fan speeds, and voltage fluctuations provides early warning signs of trouble. This data helps identify when seasonal affects on pcs begin to manifest.
Physical maintenance is another critical step. Regularly cleaning fans, vents, and internal components prevents dust, pollen, and debris from reducing cooling efficiency. During winter and spring, when indoor heating and open windows circulate particles, this habit becomes especially important. Likewise, ensuring cables and power supplies are connected to surge protection devices safeguards against seasonal electrical risks.
Environmental control should not be underestimated. Using air conditioning during summer, humidifiers in winter, and air purifiers year-round can stabilize the indoor climate and create a safer operating environment for PCs. Placement also matters; keeping a computer off the floor, away from direct sunlight, and out of overly damp or dry spaces minimizes exposure to harmful conditions. Each of these steps directly reduces the question of does the weather changing affect your pc from being a concern to being a manageable reality.
Finally, adopting habits like allowing laptops to acclimate when moving between extreme temperatures, shutting down systems during electrical storms, and performing regular backups ensures both the hardware and the data remain secure. Preparation is about building resilience, not just reacting to problems as they arise.
Conclusion
Seasonal changes influence nearly every aspect of computer performance and longevity. From summer heat that pushes systems toward overheating to winter dryness that amplifies static risks, every shift in the environment presents unique challenges. Even the milder seasons of spring and fall carry hidden threats such as humidity, pollen, and condensation. Recognizing the seasonal affects on pcs is crucial for anyone who relies on technology for work, communication, or entertainment.
The question does the weather changing affect your pc is best answered with an understanding of how external conditions translate into internal stress. The answer is a resounding yes, but with proper awareness and preparation, these effects can be minimized. Knowing how can you prepare for season changes for your pc allows users to take proactive steps that ensure systems remain efficient, reliable, and safe year-round.
Caring for a PC is not just about software updates or replacing parts when they fail. It is about respecting the environment in which the computer operates. By cleaning, monitoring, and controlling indoor climates, users can extend the lifespan of their machines and avoid costly repairs. In a world where technology is deeply woven into daily life, seasonal preparation is not optional, it is essential.
Need Computer Services Near You?
Here at B & L Custom Computers, we specialize in creating custom-built computers to meet the unique needs of our customers. With 18+ years of experience, we also offer high-quality newly built & refurbished computers that look and perform like new. Our services extend beyond sales to include computer repairs, upgrades, data migration, and recovery. Whether you need a new computer, a repair, or help with virus removal or spamware, our experienced team is here to provide expert assistance. Contact us today to learn more about what we can do for you!
Building your own gaming pc can feel like an exciting adventure—half puzzle-solving, half tech magic. Whether you want to experience ultra-smooth gameplay at high frame rates or simply have a machine tailored to your exact needs, learning how to get started on a gaming pc build is an investment in both performance and personal satisfaction. For many gamers, the process isn’t just about assembling hardware; it’s about creating a system that represents their style, preferences, and future ambitions in gaming. In this guide, we’ll explore everything from where to start with new parts for a gaming pc to the subtle tips and tricks that make the difference between a good build and a great one.
The Core Components of a Gaming PC
When it comes to assembling a gaming pc, understanding each core component’s role is essential before you even pick up a screwdriver. At the heart of the system is the central processing unit (CPU), which acts as the “brain” of your machine. For gaming, a CPU with strong single-core performance is often more important than sheer core count—although modern titles increasingly benefit from multi-threading. Pairing the right CPU with your graphics processing unit (GPU) is crucial, as the GPU is responsible for rendering the visuals that make games immersive. This is where most of your budget will often go, and for good reason: a powerful GPU can breathe life into games at higher resolutions and settings.
The motherboard is the backbone, connecting every part together. Its chipset and form factor will dictate what CPUs you can use, how much RAM is supported, and what future upgrades are possible. Random access memory (RAM) plays a significant role in smooth performance, with 16GB being the modern baseline for gaming, while 32GB is becoming common for future-proofing and multitasking. Then there’s storage—solid state drives (SSDs) have revolutionized load times, making them a must-have for gamers who want near-instant transitions between game worlds.
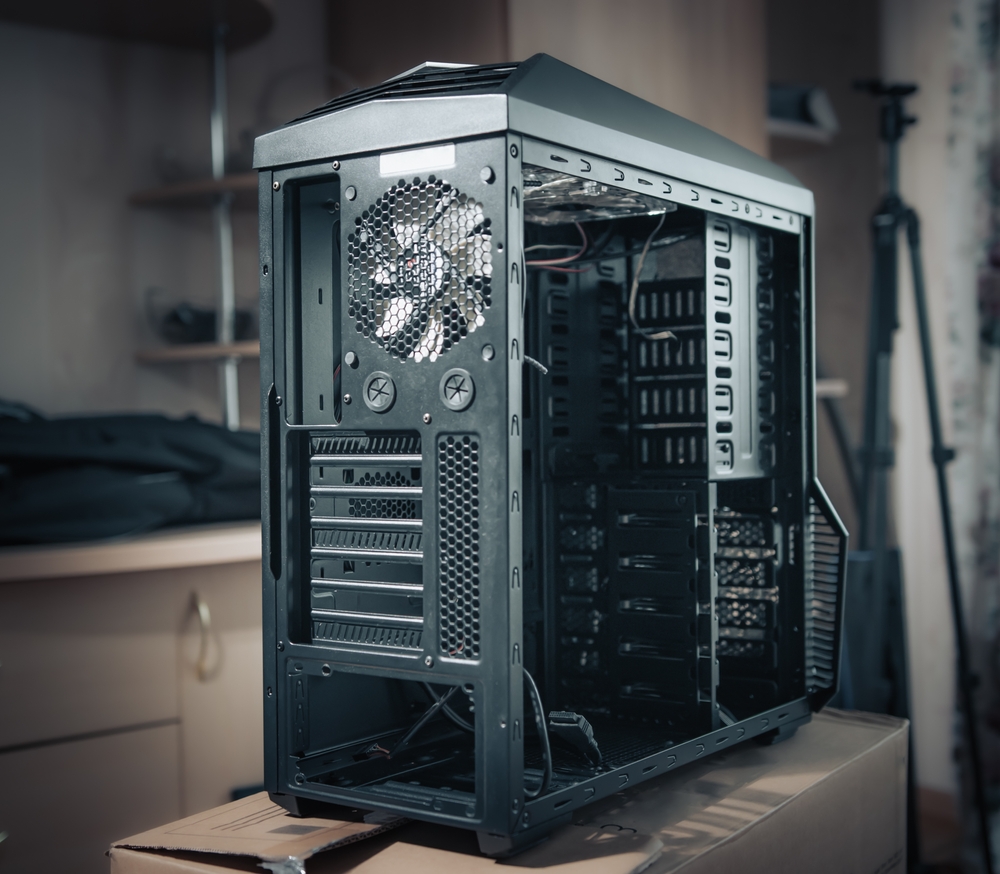
Don’t overlook the power supply unit (PSU). A reliable, efficient PSU ensures stable power delivery and longevity for your components. Aim for a unit with an 80 Plus Bronze certification or higher, and always allow for extra wattage above your current needs to support upgrades down the line. Finally, your case not only houses everything but also affects airflow, noise levels, and ease of building. The best case is one that balances style with functionality, offering good cable management options and adequate cooling.
Understanding these parts upfront makes it easier to decide where to allocate your budget, how to match components, and how to avoid bottlenecks that could hinder your gaming experience.
Where to Start With New Parts for a Gaming PC
If you’re wondering where to start with new parts for a gaming pc, the first step is defining your goals. Ask yourself what types of games you want to play and at what settings. Competitive esports titles like Valorant or CS2 require strong CPU performance and high refresh rates, while AAA open-world games lean heavily on the GPU for rich graphics and complex environments. Your choices will also depend on whether you’re targeting 1080p, 1440p, or 4K resolution.
Once you’ve set performance expectations, create a budget. While it’s tempting to splurge on the most powerful parts, balance is key. Spending disproportionately on a GPU while skimping on the CPU can cause performance imbalances, and the same applies in reverse. Use part compatibility tools online to make sure your selected components work together, and check for potential size or clearance issues—especially with larger GPUs and CPU coolers.
Another important consideration is future-proofing. Choosing a slightly more advanced CPU platform or motherboard now might save you from replacing the entire system sooner. For example, opting for a motherboard that supports PCIe 5.0 or DDR5 RAM ensures compatibility with upcoming hardware generations. Also, don’t underestimate the value of a good cooling solution, whether that’s air or liquid cooling. Keeping temperatures low can maintain performance over time and extend the life of your parts.
Research is your best friend at this stage. Read benchmark reviews, watch build guides, and look at how your preferred games perform with the components you’re considering. This early groundwork ensures you’re making smart choices and getting the most out of every dollar you spend.
Tips and Tricks for a Smooth Build Process
Even if you’ve selected the perfect components, the build process itself can present challenges—especially for beginners. One of the most important tips and tricks is to prepare your workspace before you begin. Have all your tools ready, including a good screwdriver, thermal paste if your cooler doesn’t come pre-applied, and an anti-static wrist strap to protect delicate electronics from static discharge.
Follow a logical assembly order. Many builders start by installing the CPU, RAM, and cooler onto the motherboard before placing it in the case. This makes it easier to access sockets and secure components without the cramped conditions of a fully assembled case. Routing cables as you go can also save headaches later and improve airflow, which is critical for cooling performance.
Patience is a virtue here. Rushing increases the risk of mistakes like bent CPU pins or improperly seated RAM. Always double-check that cables are securely connected, especially the CPU power cable, which is often overlooked. For first-time builders, it’s worth having a video tutorial on hand that uses the same or similar components.
After assembly, the first boot is a thrilling moment—but be ready for troubleshooting. If the system doesn’t power on, recheck all connections, consult your motherboard’s diagnostic LEDs or beep codes, and verify that the PSU switch is set to “on.” Sometimes, the simplest solutions—like reseating a loose RAM stick—solve the problem.
Cable management is both an art and a science. Not only does tidy cabling make your build look professional, but it also improves airflow and makes future upgrades easier. Use zip ties or Velcro straps to bundle cables and route them through the case’s dedicated channels.
Optimizing and Maintaining Your Gaming PC
Once your gaming pc is up and running, the work doesn’t stop. Optimization and maintenance are key to getting the best performance over the long term. Begin by updating all drivers—especially for the GPU—since new versions can significantly improve game performance and stability. Your motherboard’s BIOS may also benefit from an update to improve compatibility and fix known issues.
Adjust in-game settings based on your hardware’s capabilities. Even a top-tier GPU might need fine-tuning for ultra-demanding games, especially at higher resolutions. Experiment with settings like texture quality, shadows, and anti-aliasing to find the best balance between visuals and frame rate.
Cooling is another ongoing concern. Keep your system clean by regularly dusting out fans and filters. Dust buildup can choke airflow and raise component temperatures, which can lead to thermal throttling or reduced lifespan. Many builders clean their PCs every three to six months, depending on the environment.
For storage management, periodically uninstall games or programs you no longer use to free up space and keep your SSD from getting too full, as performance can degrade when it’s nearly maxed out. You can also enable features like Windows Game Mode to prioritize gaming performance and minimize background processes.
Finally, monitor your system’s health using software tools. Tracking temperatures, fan speeds, and CPU/GPU usage can help you spot issues early—before they affect your gameplay. By keeping your gaming pc in top condition, you ensure it delivers smooth, reliable performance for years to come.
The Joy of Customization and Upgrading
One of the most rewarding aspects of building a gaming pc is the ability to customize and upgrade over time. Unlike pre-built systems, a custom build allows you to swap out parts as new technology emerges, keeping your system current without starting from scratch. Whether it’s upgrading your GPU for the latest blockbuster titles or adding more RAM for multitasking, your pc can evolve with your needs.
Customization extends to aesthetics as well. Many builders enjoy adding RGB lighting, themed cables, or even custom water-cooling loops to give their rig a unique look. Cases with tempered glass panels turn your pc into a showcase piece, while software-controlled lighting lets you match your setup’s mood or game theme.
Overclocking is another avenue for performance enthusiasts. By carefully increasing the operating speeds of your CPU or GPU, you can squeeze out extra performance—though it requires good cooling and some technical know-how. Done responsibly, it’s a fun way to maximize your investment.
Upgrades don’t always have to be major. Swapping in a faster SSD, adding extra fans, or improving cable management can all enhance your overall experience. And because you’ve built the system yourself, you’ll have the confidence to tackle these changes without fear.
This flexibility and personalization are what make building your own gaming pc so appealing. It’s more than just a machine; it’s a project that grows with you, adapting to both the gaming industry’s evolution and your personal preferences.
Conclusion
Building a gaming pc is as much about the journey as the destination. From understanding each component’s role to knowing where to start with new parts for a gaming pc, every decision shapes the final performance and feel of your system. Applying practical tips and tricks during the build process not only makes assembly smoother but also sets you up for easier maintenance and upgrades in the future.
The ability to tailor your rig to your exact needs—both in performance and aesthetics—creates a sense of ownership and pride that’s hard to match with pre-built systems. Plus, the knowledge you gain along the way empowers you to optimize, troubleshoot, and enhance your pc for years to come.
Whether you’re a first-time builder eager to learn how to get started on a gaming pc build or a seasoned enthusiast chasing the perfect setup, the key is to enjoy the process, embrace the challenges, and appreciate the flexibility a custom-built system offers. With the right planning, patience, and passion, your gaming pc will be more than a tool for entertainment—it will be a reflection of your dedication to the games you love.
Need Computer Services Near You?
Here at B & L Custom Computers, we specialize in creating custom-built computers to meet the unique needs of our customers. With 18+ years of experience, we also offer high-quality newly built & refurbished computers that look and perform like new. Our services extend beyond sales to include computer repairs, upgrades, data migration, and recovery. Whether you need a new computer, a repair, or help with virus removal or spamware, our experienced team is here to provide expert assistance. Contact us today to learn more about what we can do for you!
As the summer months settle in and temperatures rise, it’s natural to focus on personal comfort, beach vacations, and ways to stay cool. But while humans seek refuge from the heat, many overlook a silent victim of soaring temperatures: their home computers. Whether it’s a desktop tucked under your desk or a laptop you carry from room to room, your computer is not immune to the effects of extreme heat. Understanding how the summer heat affecting computers can cause long-term damage is crucial, especially for those who rely on their devices for work, gaming, or daily tasks.
The Science Behind Heat and Computer Performance
Computers, like any electronic device, generate heat during operation. CPUs, GPUs, power supplies, and hard drives all contribute to this internal heat. Under normal conditions, internal fans, heat sinks, and sometimes liquid cooling systems work efficiently to dissipate this heat. But when external temperatures rise during summer, these cooling mechanisms can become overburdened.
Ambient room temperature plays a significant role in how effectively your computer’s internal cooling systems can perform. When the air around your computer is already warm, fans must work harder to draw cooler air through the system. In extreme cases, computers might struggle to maintain safe operating temperatures, leading to throttling. This is when your system intentionally slows down its performance to reduce heat output—a protective measure that, while helpful in the short term, can hinder your productivity and computing experience.
Prolonged exposure to high temperatures can also degrade electronic components over time. Circuit boards, capacitors, and batteries can suffer from repeated heat stress, shortening the lifespan of your device. This makes keeping your computer cool in the summer heat not just a convenience, but a necessity for longevity and reliability.
Common Signs of Heat-Related Issues in Computers
Not every computer user immediately notices when heat becomes an issue. However, several warning signs indicate your system might be suffering from heat-related stress. One of the first symptoms is an increase in fan noise. If your desktop or laptop fans are running at high speed more frequently, it’s a sign the system is working overtime to cool itself.
Another indicator is system slowdowns. When you notice lagging performance during tasks that previously ran smoothly—such as video playback, gaming, or even general multitasking—it might be due to thermal throttling. Unexpected shutdowns or restarts are more severe symptoms, often triggered by internal temperature sensors detecting unsafe levels.
Physical touch can also provide clues. If your laptop feels unusually hot on the bottom, or your desktop case is warm to the touch near exhaust fans, it could suggest internal temperatures are exceeding optimal levels. In such cases, ignoring these signs can eventually lead to hardware damage, data loss, or complete system failure.
How to Avoid Summer Heat Harming Your Computers
The good news is that mitigating heat issues is relatively straightforward when approached proactively. Start by ensuring your computer is in a well-ventilated space. Avoid positioning your desktop directly against walls or placing your laptop on soft surfaces like beds or couches, which can block ventilation ports. Ideally, your computer should have several inches of clearance on all sides to allow for proper airflow.
Routine cleaning plays a vital role in preventing overheating. Dust accumulation inside cases, on fans, and across heat sinks significantly impairs cooling efficiency. Over time, dust acts like insulation, trapping heat instead of allowing it to dissipate. Use compressed air to clean vents and internal components carefully, particularly before and during summer months.
Consider investing in cooling accessories. Laptop cooling pads, which incorporate extra fans, can enhance airflow beneath your laptop. Similarly, upgrading your desktop’s cooling system with additional case fans or a better CPU cooler can make a noticeable difference.
Monitoring software tools also offer insight into your system’s temperatures. Applications such as HWMonitor or Core Temp can help you track real-time CPU and GPU temperatures. Keeping an eye on these readings allows you to act promptly if temperatures begin approaching unsafe levels.
For those with dedicated computer rooms, air conditioning or even a small fan directed at the computer can help regulate ambient temperatures. If possible, avoid using your computer during the hottest parts of the day, particularly for resource-intensive tasks like gaming or video editing. By applying these strategies, you significantly reduce the risk of summer heat harming your computers.
Keeping Your Computer Cool in the Summer Heat: Long-Term Benefits
Maintaining optimal temperatures during summer not only safeguards your computer from immediate shutdowns or slowdowns but also yields substantial long-term benefits. Heat is one of the primary factors contributing to hardware failure. Over time, excessive heat cycles weaken solder joints, degrade thermal paste between CPUs and heat sinks, and reduce battery life in laptops.
By consistently keeping your computer cool in the summer heat, you extend the operational life of your system’s components. A well-maintained cooling system allows your processor and graphics card to function without unnecessary throttling, preserving their performance capabilities. Hard drives, particularly older spinning disk models, are sensitive to high temperatures, with data integrity potentially at risk if overheating becomes chronic.
For laptop users, battery health is another critical factor influenced by temperature. Lithium-ion batteries degrade faster when exposed to heat. Ensuring your laptop operates within safe temperature ranges can preserve battery capacity and reduce the frequency of battery replacements.
From a financial perspective, protecting your computer from heat damage translates into savings. Replacing a graphics card, processor, or motherboard due to heat-related failure can be expensive, not to mention the cost of potential data recovery if your hard drive suffers damage. Proactively addressing heat issues reduces the likelihood of such costly repairs or replacements.
Be Proactive to Beat the Heat
As summer temperatures climb, the hidden impact on your home computer shouldn’t be ignored. The risk of the summer heat affecting computers is real, yet entirely manageable with some basic attention and care. By recognizing the warning signs of overheating, improving ventilation, conducting regular computer maintenance, and possibly investing in additional cooling solutions, you can effectively protect your computer.
Understanding how to avoid summer heat harming your computers empowers you to take timely actions that safeguard your device’s performance and longevity. Whether you’re a gamer, remote worker, or casual user, maintaining a cool computer environment during summer isn’t just beneficial—it’s essential.
From keeping your computer cool in the summer heat to optimizing performance year-round, these preventive measures provide peace of mind and protect your investment. By taking a few practical steps, you ensure that while summer brings warmth and sunshine, your home computer stays comfortably cool.
Need Computer Services Near You?
Here at B & L Custom Computers, we specialize in creating custom-built computers to meet the unique needs of our customers. With 18+ years of experience, we also offer high-quality newly built & refurbished computers that look and perform like new. Our services extend beyond sales to include computer repairs, upgrades, data migration, and recovery. Whether you need a new computer, a repair, or help with virus removal or spamware, our experienced team is here to provide expert assistance. Contact us today to learn more about what we can do for you!
The evolution of technology has been a driving force in transforming how businesses operate, and few sectors have been as deeply impacted as information technology (IT). The rise of remote work has brought a revolutionary shift in IT support models, giving rise to what is now widely known as remote IT support. With teams dispersed across cities, states, and even countries, businesses have had to rethink how they approach problem-solving, maintenance, and infrastructure management. And surprisingly, the answer often lies not in a centralized office but in the cloud, virtual desktops, and real-time screen sharing. Let’s explore how remote IT work makes life easier for businesses, employees, and support teams alike.
The Shift from Traditional to Remote IT Support
Traditionally, IT departments were on-site, directly interacting with hardware and end users. When a computer broke down, someone from IT physically walked over to troubleshoot it. While this model worked for many years, it came with several inefficiencies: long wait times, limited scalability, and the need for physical presence. However, as internet connectivity improved and cloud-based tools matured, a new model began to emerge—remote IT support.
This model doesn’t just replicate what on-site teams do—it enhances it. Through software like remote desktop tools, VPN access, and cloud-based service desks, IT professionals can now solve problems without needing to be in the same room, building, or even country as the user. For businesses, this means support becomes more agile, responsive, and cost-effective. The benefits of remote IT support go far beyond convenience—they are redefining the core of IT service delivery.
Flexibility and Speed: The Immediate Gains
One of the most immediate benefits of remote IT support is the unparalleled flexibility it offers. When IT staff work remotely, they’re often available across more extended hours or even in different time zones, offering true 24/7 coverage. This is particularly valuable for businesses that operate globally or across different shifts. When something goes wrong—whether it’s a software glitch or a failed update—a remote technician can respond in real time, often within minutes.
Problem-solving becomes faster and less disruptive. In the past, users had to wait for someone to arrive at their desk, potentially delaying critical work. Now, they can grant remote access with a few clicks, enabling technicians to diagnose and fix issues almost instantly. This not only improves productivity but also reduces stress levels among employees. Knowing that help is just a ticket or a chat message away contributes significantly to workplace morale.
Furthermore, remote IT teams are more likely to use automation tools and proactive monitoring systems, identifying and resolving issues before users even notice them. This preemptive approach to IT management is one of the strongest arguments for why remote IT support makes problem solving easy.
Cost-Effectiveness and Resource Optimization
Another major advantage of remote IT work is its cost efficiency. Maintaining an on-site IT department with sufficient staff to handle every issue across an entire organization is expensive. Remote IT support allows businesses to optimize their resources by centralizing expertise and deploying it virtually. This way, instead of hiring full-time IT personnel in every office, a company can maintain a lean team capable of supporting multiple locations from a central hub.
This model also reduces costs associated with physical infrastructure. There’s less need for office space, hardware inventory, and other overhead expenses that come with housing a full-fledged IT department on site. In cases where remote IT support is outsourced, businesses can benefit from predictable pricing models and service level agreements, allowing for more accurate budgeting.
Moreover, remote support aligns with the broader trends toward cloud computing and Software as a Service (SaaS), where much of the operational load is shifted from internal teams to external providers. This allows internal IT teams to focus on strategic initiatives rather than being bogged down by day-to-day troubleshooting.
Enhancing User Experience and Accessibility
One often overlooked aspect of remote IT support is how it enhances user experience. Employees can receive help no matter where they are—at home, traveling, or at a satellite office. This level of accessibility is crucial in today’s hybrid work environment, where team members are rarely all in the same place at the same time. With secure remote access tools, technicians can safely diagnose and fix problems without compromising the user’s data or security.
Remote support often includes chatbots, AI-driven ticketing systems, and knowledge bases that empower users to solve simple issues themselves. For more complex problems, live screen sharing and real-time collaboration tools provide the same level of service—if not better—than what could be offered in person. These enhancements dramatically improve resolution times and increase user satisfaction.
The scalability of remote IT support also plays a vital role in accessibility. Whether a company grows by 10 or 1,000 employees, scaling up support services is as simple as adjusting the service package or onboarding new team members virtually. The remote model inherently supports business growth and expansion without requiring proportional increases in physical IT resources.
Security and Compliance: Busting the Myth
One common concern about remote IT work is security. Critics often argue that allowing IT personnel to access systems from afar could lead to vulnerabilities. However, the reality is quite the opposite. Remote IT support platforms are built with security in mind, employing end-to-end encryption, multi-factor authentication, and strict access controls. In many cases, these tools offer more robust security protocols than traditional on-site models.
Furthermore, compliance becomes easier to manage in a remote IT environment. Centralized control panels allow IT administrators to enforce policies across all devices, regardless of their location. Patch management, software updates, and antivirus protections can all be deployed remotely, ensuring every endpoint remains secure and compliant with regulations such as GDPR, HIPAA, or SOC 2.
Audit trails and activity logs provide transparency, allowing businesses to monitor who accessed what system and when. This level of oversight is crucial for organizations operating in regulated industries, and it’s a prime example of why remote IT support makes problem solving easy—not only can issues be fixed quickly, but they’re also tracked and documented in ways that support ongoing compliance and accountability.
A Future-Proof Model for IT Services
As we look toward the future, it’s clear that remote IT support isn’t just a trend—it’s the new standard. The COVID-19 pandemic may have accelerated the adoption of remote work, but the model’s inherent advantages mean it’s here to stay. Businesses that embrace remote IT support will find themselves more agile, more resilient, and better equipped to handle the challenges of a fast-moving digital world.
Remote IT work also aligns with broader societal trends, such as the emphasis on work-life balance, sustainability, and global collaboration. IT professionals can work from wherever they are most productive, reducing commute times and carbon footprints while still delivering top-tier support. This results in a more satisfied workforce and a company that’s better positioned to attract and retain talent.
Conclusion
The benefits of remote IT support are numerous and far-reaching. From flexibility and cost savings to enhanced security and scalability, this model addresses many of the pain points that plagued traditional IT departments. And most importantly, it makes problem-solving easier, faster, and more efficient for everyone involved. As businesses continue to evolve, remote IT support will remain a cornerstone of smart, future-ready operations.
Need Computer Services Near You?
Here at B & L Custom Computers, we specialize in creating custom-built computers to meet the unique needs of our customers. With 18+ years of experience, we also offer high-quality newly built & refurbished computers that look and perform like new. Our services extend beyond sales to include computer repairs, upgrades, data migration, and recovery. Whether you need a new computer, a repair, or help with virus removal or spamware, our experienced team is here to provide expert assistance. Contact us today to learn more about what we can do for you!
Performance and longevity are at the forefront of every PC enthusiast’s mind. Whether you’re a casual user, a hardcore gamer, or a professional content creator, understanding the importance of proper cooling for your PC can significantly influence your system’s efficiency, reliability, and lifespan. PC cooling systems are not just a luxury for high-performance builds—they are a critical component that protects your investment. As processors and graphics cards become increasingly powerful, they generate more heat. Without adequate cooling, this heat can degrade performance, shorten component lifespan, and even cause permanent damage. This blog delves into why proper cooling is essential, how PC cooling systems function, and offers practical advice on how to update your PC’s cooling system effectively.
The Science Behind Heat and Performance
At the heart of every computer lies the central processing unit (CPU) and, in many modern systems, a discrete graphics processing unit (GPU). These components execute millions of calculations per second, a process that inevitably generates heat. As the temperature of these components rises, their performance can begin to throttle to prevent damage—a mechanism known as thermal throttling. This automatic adjustment reduces clock speeds and voltage, limiting performance in favor of temperature control.
Moreover, consistent exposure to high temperatures can deteriorate the thermal paste that aids in heat dissipation between a processor and its heatsink. Over time, the degraded paste becomes less effective, increasing thermal resistance and leading to even higher temperatures. Additionally, heat affects the longevity of capacitors and other sensitive components on the motherboard and GPU. Therefore, maintaining an optimal thermal environment is essential for ensuring that all parts of your PC function at their best for as long as possible.
PC cooling systems aim to dissipate this heat and maintain safe operating temperatures. They achieve this through air cooling, liquid cooling, or hybrid solutions. Understanding how these systems work can help users appreciate their role and recognize the signs when a cooling system may need upgrading or replacement.
Types of PC Cooling Systems
There are two primary types of PC cooling systems: air cooling and liquid cooling. Each has its own advantages and ideal use cases depending on system demands, ambient environment, and budget.
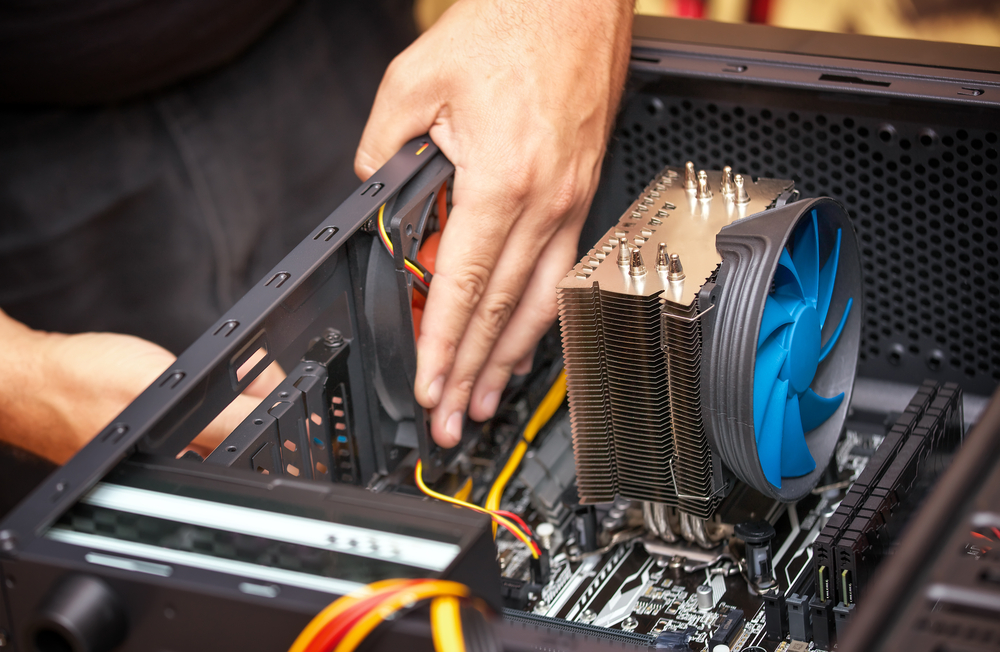
Air cooling is the most common and economical method. It relies on heatsinks and fans to draw heat away from components and expel it from the case. A well-designed air cooling setup includes case fans for intake and exhaust, a CPU heatsink with a fan, and sometimes aftermarket GPU coolers. Air cooling is typically sufficient for most users, especially those with mid-range or office PCs.
Liquid cooling, on the other hand, is favored by enthusiasts and professionals who require silent operation or who engage in tasks that place sustained loads on the CPU and GPU. These systems use a liquid coolant to transfer heat from components to a radiator, where fans then dissipate the heat. Closed-loop all-in-one (AIO) liquid coolers are relatively easy to install and maintain, making them a popular choice for many. Custom liquid loops, while offering superior cooling performance and aesthetics, require significant planning and maintenance.
Hybrid systems combine the best of both worlds, utilizing both air and liquid elements to maximize cooling efficiency. Whichever type you choose, the goal remains the same: maintain component temperatures within manufacturer-specified limits to ensure optimal operation and longevity.
Recognizing Inadequate Cooling
Signs of insufficient cooling can range from subtle to obvious. One of the earliest indicators is an increase in system fan noise. As components heat up, fans ramp up to compensate, creating a noticeable rise in ambient noise. Another clue is decreased performance, especially under load. If your system lags during gaming or video rendering, it might be due to thermal throttling.
More alarming signs include sudden shutdowns or restarts, which can occur when components exceed their maximum temperature thresholds. Monitoring software like HWMonitor, Core Temp, or MSI Afterburner can provide real-time insights into system temperatures and help identify potential issues before they escalate.
Dust buildup is another major contributor to poor cooling. Over time, dust can clog fans, restrict airflow, and insulate heat-producing components. Regular cleaning with compressed air and ensuring good cable management can significantly improve airflow and cooling performance.
How to Update Your PC’s Cooling System
Updating your PC’s cooling system is a proactive step toward ensuring long-term performance and reliability. Start by evaluating your current setup. If you’re using the stock cooler that came with your CPU and notice high temperatures, upgrading to an aftermarket air or AIO cooler can make a significant difference.
Next, assess your case airflow. Effective cooling starts with a case that supports good airflow. This means having enough intake and exhaust fans, and arranging them to create a front-to-back airflow pattern. If your case lacks ventilation, consider upgrading to a more airflow-optimized model.
If you’re running a high-end CPU or planning to overclock, a liquid cooling system might be a worthwhile investment. AIO coolers provide better thermal performance than most air coolers and often come with RGB lighting and sleek aesthetics. For those seeking the ultimate cooling solution and are comfortable with advanced setups, a custom loop offers unmatched performance and visual appeal, although it comes with higher costs and maintenance requirements.
Don’t overlook your thermal paste either. Reapplying high-quality thermal paste every couple of years can rejuvenate thermal transfer between your CPU and cooler, especially if temperatures have crept up over time.
Finally, consider monitoring tools and fan controllers. Software-based fan curves allow you to adjust fan speeds based on temperature readings, balancing noise and cooling performance. Hardware fan controllers or BIOS settings provide similar functionality and are essential for fine-tuning your system’s thermal response.
The Long-Term Benefits of Effective Cooling
Proper cooling is not just about immediate performance—it’s an investment in your PC’s future. A well-cooled system experiences less thermal stress, resulting in fewer hardware failures and longer component lifespans. This translates into cost savings over time, as you won’t need to replace parts as frequently or deal with downtime due to overheating issues.
Efficient PC cooling systems also enhance user experience. Quieter operation, stable performance under load, and lower ambient case temperatures contribute to a more enjoyable and productive computing environment. For gamers, this can mean smoother frame rates and uninterrupted play. For professionals, it ensures consistent rendering speeds and less time troubleshooting hardware issues.
Moreover, with the rise of high-performance computing tasks—such as 4K video editing, 3D modeling, and AI workloads—adequate cooling becomes even more critical. As demands on hardware grow, so too must the systems that keep that hardware running at optimal temperatures.
Conclusion
The importance of proper cooling for your PC cannot be overstated. Whether you’re building a new system or maintaining an existing one, taking the time to understand and implement effective cooling solutions is essential. By learning how to update your PC’s cooling system, monitoring for signs of inadequate cooling, and staying proactive in maintenance, you not only protect your investment but also ensure a reliable, high-performance computing experience for years to come.
Need Computer Services Near You?
Here at B & L Custom Computers, we specialize in creating custom-built computers to meet the unique needs of our customers. With 18+ years of experience, we also offer high-quality newly built & refurbished computers that look and perform like new. Our services extend beyond sales to include computer repairs, upgrades, data migration, and recovery. Whether you need a new computer, a repair, or help with virus removal or spamware, our experienced team is here to provide expert assistance. Contact us today to learn more about what we can do for you!